Most bike storage advice is written for someone with a barn and a bike they ride twice a summer. This is for the other situation: a one-car garage, two bikes you actually ride, and no floor space left to lay either of them down where the garage door can drop on it.
I have owned eight racks in twelve years. A trunk strap rack scratched the paint on a car I liked. A hanging rack swung into a highway divider with two bikes on it, and I still think about that drive. The tray rack on my car now survived a deer strike, which is the only reason I still trust it. None of that taught me anything about storage. What it taught me is that a bike storage and transport setup has two jobs, and they are not the same job.
Job one is where the bike lives when you are not riding it. Job two is how the bike carries things when you are. Solve both and you stop taking the car for errands you could do on two wheels.
This guide is a how-to for both halves: a freestanding vertical stand that gets the good bike off the garage floor, and a seat post rear rack that makes a commuter useful. Neither is a hitch rack, and I will tell you exactly where each one stops being the right answer, because that is the part most buying advice skips.
Why you should trust me
I ride road and gravel out of Boulder, Colorado. I commute, I race crits, and most weekends the bikes go to the mountains. Twelve years and eight racks, including the trunk strap that scratched a car, the hanging rack that swung into a divider, and the tray rack that survived a deer strike at highway speed.
I measure the things that decide whether a rack actually gets used: how long installation takes, how much it moves at 75 mph, and how long it takes to load a bike in the dark after a long ride. I do not review roof racks. I am a hitch person and I say so. What follows is the storage and light-cargo side of the same problem, which is the side most riders never think about until the garage is full.
How I picked these two
These are not the only ways to store or carry a bike, so here is the filter I used.
Fit range first. If a product only works for one wheel size, it is a niche product that will be useless the next time you buy a bike. Both of these cover a spread of wheel sizes, and the rear rack covers 20 through 29 inches.
No permanent modifications. I will not recommend drilling a garage wall or clamping anything to a frame without the frame maker's blessing. Both of these install with ordinary hand tools.
Load limits stated in the open. A rack that will not tell you what it holds is a rack that has not been tested honestly. The rear rack publishes 15 kg, or 33 pounds, and that number covers the rack, the bags, and everything you put in them.
A clear ceiling. Every product has a line where it stops being safe. For the stand, that line is bike weight and wheel size. For the rack, it is total load and seat post type. I would rather you know the line before you buy than find it on I-70 at 75 mph.
Step one: measure the space before you buy anything
This is the step people skip, and it is the one that decides whether the gear gets used or becomes clutter.
- Ceiling height. You are standing a bike up, so measure from the floor to the lowest thing overhead. That is usually a garage door track or a light fixture, not the ceiling itself.
- Floor footprint. A freestanding stand needs a patch of floor plus room to roll it out. If it lives behind the snowblower, it does not exist.
- Door swing. Which door do you bring the bike through? A stand eight feet from the door you actually use will be empty most of the year.
- The bike itself. Measure wheelbase and tire width. A stand built for 24 to 29 inch standard bikes is not built for a fat bike, and it is not built for a loaded e-bike.
- Heel room on the commuter. If you are adding a rear rack, you need clearance between your heel and the bag when you pedal. That measurement decides whether the rack works for you.
Step two: get the bike off the floor
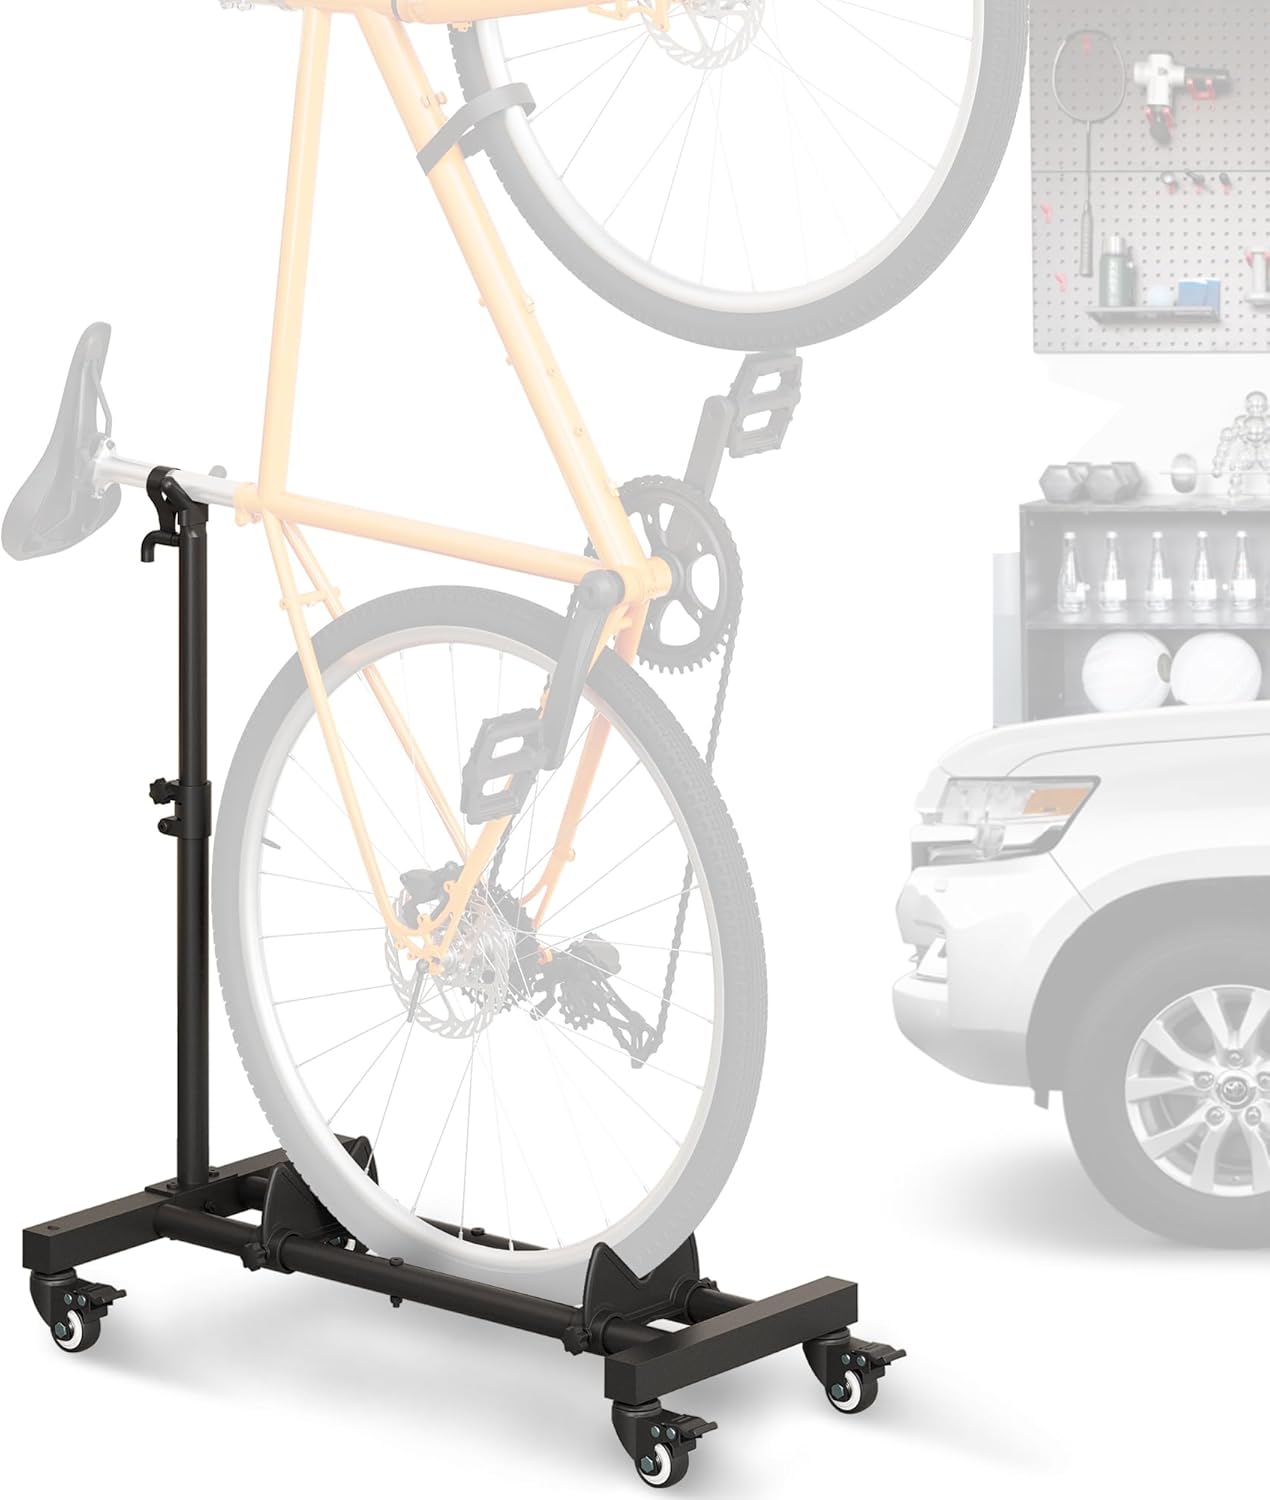
Our pick: Vertical Bike Stand, Freestanding Bike Rack for Garage Storage, Upright Bicycle Floor Stand with Adjustable Height and 360° Rolling Wheels, Space Saving Indoor Bike Holder for 24"-29" Standard Bikes
 Visit on Amazon →
This is the piece that solves the floor problem without touching a wall. It stands on its own base, holds a bike upright, adjusts for height, and rolls on 360 degree wheels so you can pull it out to sweep or shove it aside when the car needs the bay. It is listed for 24 to 29 inch standard bikes.
The height adjustment is the feature that matters most, because it is what lets one stand handle a smaller bike and a 29er without you buying two products. The rolling wheels are the second feature that matters, because a stand you cannot move is a stand that ends up bolted in the wrong place forever, or worse, in the way.
Flaws but not dealbreakers: This is a standard-bike stand. If you ride a fat bike, a loaded e-bike, or a 20 inch wheel bike, check the fit and the weight before you order. A 60 pound e-bike is a different category of object and deserves a stand rated for it.
Who it is for: Anyone with a garage or a spare room, one or two bikes, and a floor that currently has a bike lying on it.
Step three: set the stand up so you actually use it
- Assemble it where it will live, not in the driveway. The frame is easier to square up when you are not carrying it back inside.
- Leave the bolts snug, not torqued, until the whole thing sits flat on the floor. Then tighten. A stand that wobbles is usually a stand that was tightened out of square on an uneven slab.
- Set the height before you load a bike. Start low, lift the bike in, and raise it until the bike clears the floor with room to spare.
- Lift by the frame, never by a wheel, a rotor, or a hydraulic hose. This is the rule that keeps a good bike good.
- Push test. With the bike in place, push the stand gently from three sides. If it tips, the height is wrong or the floor is not level. Fix it now, not at 6 a.m. when you are already late.
- Check the contact points. Nothing should be pressing on a brake rotor, a derailleur, or a carbon seat post. If something touches that should not, move the bike, not the part.
Step four: give the commuter a way to carry things
Our pick: WEEROCK Adjustable Universal Rear Bike Rack, Fits 20" 24" 26" 27.5" 29" Inch Bicycles, MTB, 15kg/33 lbs Load Capacity Steel Bicycle Carge Rack, Easy Installation on Bicycle Seat Post
 Visit on Amazon →
This is the rack that turns a bike into transportation instead of just a workout. It is a steel seat post rack listed for 20, 24, 26, 27.5 and 29 inch bicycles, with a stated capacity of 15 kg or 33 pounds. It clamps to the seat post, which means no frame mounts, no drilling, and no wrestling with braze-ons your commuter probably does not have.
The universal fit is the reason to pick it over a frame-mounted rack. If you own one commuter and one mountain bike, a seat post clamp moves between them in minutes. The steel construction is the reason it holds up to grocery runs and a laptop bag without feeling flexy under load.
Flaws but not dealbreakers: Seat post mounting carries the load high and behind the rear axle, so handling changes when the rack is loaded. The 33 pound figure includes the rack and the bags, not just your cargo. And a seat post rack is not a touring rack. If you are planning loaded overnight trips, this is the wrong tool.
Who it is for: Commuters, errand runners, and anyone who wants one bike to do more than one job without adding a hitch to the car.
Step five: install the rack without damaging the seat post
- Confirm the post. Measure the seat post diameter and check the material. If it is carbon, get the post maker's guidance before you clamp anything to it. That is not optional.
- Confirm the bike. The rack is listed for 20 through 29 inch wheels. Check that your frame leaves room at the rear for the rack arms and your bags.
- Dry fit first. Slide the clamp on, set the rack level, and look at the gaps before you tighten a single bolt. Level matters, because a rack that sits crooked puts uneven load on the clamp.
- Tighten evenly. Alternate sides a little at a time so the clamp does not cock sideways on the post.
- Heel check. Sit on the bike, pedal backwards, and watch your heel path. Move the rack rearward or the bags forward until nothing rubs. Do this before you ride, not after.
- Check the moving parts. On a full suspension bike, cycle the rear travel and watch clearance between the rack, the tire, and the brake. If it is tight, this is not the rack for that bike.
- Load test at home. Put the real load on, ride around the block, then re-check every bolt. Racks that loosen do it in the first ten miles, not the first thousand.
Where this setup stops being the right answer
- Two bikes on the highway at 75 mph. That is a hitch rack job, and a tray rack at that. The seat post rack is for around town.
- A carbon seat post with no clamp guidance. Do not clamp it. Ask the post maker first, and if the answer is no, look at a frame-mounted rack instead.
- An e-bike or a fat bike in the vertical stand. Check the weight rating and the wheel fit before you trust it with a bike that costs more than the stand.
- A full suspension mountain bike with a rear rack. Check clearance through the travel. If it is tight, skip it.
- Anything over 33 pounds total on the rear rack, including the rack, the bags, and the groceries.
- RVs and fifth wheels. Different weight and wind physics, and out of scope here.
What this all costs
Both products are sold on Amazon and prices move constantly. Check current Amazon price on each listing through the links above rather than trusting a number printed in an article, including this one.
What I can tell you is the shape of the math. A hitch rack setup for two bikes is a several-hundred-dollar decision plus a hitch install. This setup is a storage decision plus a commuter decision, and it pays you back in the car trips you stop making. The stand is what keeps a bike from becoming garage clutter you quietly stop riding. The rack is what makes a short errand faster by bike than by car.
Neither one replaces a tray rack for highway travel. If you are hauling two bikes to the mountains every weekend, that is a different article and a different budget.
The part that actually matters
Buy the stand because a bike on the floor is a bike that gets stepped over. Buy the rack because a bike that cannot carry anything is a bike that only gets ridden for fun.
Measure first. Set the height before you load. Check heel clearance before you ride. Re-torque the bolts after the first ride. That is the whole job, and it fits in an afternoon.
Do it once, and the garage stops being where bikes go to die.