Most people buy a hitch bike rack before they ever read the sticker on their own hitch. That order is backwards. The rack is the easy half of the decision: capacity, tilt, locks, straps. The hard half is the receiver under your bumper, and it decides what you are allowed to carry before you ever open a product page.
I have bought eight racks in twelve years, and the two that failed were not the expensive ones. A trunk strap rack scratched the paint on a car I had owned for six weeks. A hanging rack swung into a highway divider on I-70 west of Denver with four bikes aboard, and I spent the next hour on the shoulder re-strapping wheels while traffic went past at 80. A tray rack took a deer strike at dusk and kept both bikes upright. That is the whole argument in one sentence: your rack is either safety equipment or it is cargo gear pretending to be safety equipment.
This is how to pick and mount a hitch bike rack so it stays put, loads fast in the dark, and never costs you a frame.
Why you should trust me
I ride road and gravel out of Boulder, race crits through the summer, and drive into the mountains most weekends with bikes hanging off the back of the car. Eight racks in twelve years: two trunk racks, three hanging hitch racks, three tray racks, plus a roof rack I sold after one season because I got tired of lifting a bike over my head into a parking garage ceiling.
What I actually check on every rack is short and boring. Mount time with a torque wrench in hand, movement at highway speed, how long it takes to load two bikes in the dark after a five-hour ride, tilt clearance with the hatch open, and whether the locks still work with winter gloves on. Those five things are the whole review. Everything else on the box is marketing.
I am a hitch person, and I say so up front. I do not review roof racks, and I do not touch RV or fifth-wheel setups, because the weight and wind physics are a different conversation entirely.
Start with the hitch, not the rack
Go outside and look at the receiver tube. There is a sticker, usually on the driver's side or tucked inside the mouth of the tube. It tells you the class, the receiver size, and the tongue weight rating. Photograph it. You will need those numbers in every buying conversation you have from here on.
Three things on that sticker matter more than anything in a product listing.
Receiver size. Two inches is the real standard. A 1.25-inch receiver will carry two light bikes, and it will move more while doing it. The temptation is to buy a 2-inch rack and a sleeve adapter to make it fit a 1.25-inch opening, and that sleeve is the single cheapest way to introduce play into the joint. Every millimeter of slop at the receiver multiplies into visible movement at the end of a loaded rack.
Tongue weight rating. This is the number people ignore. It is a static dead-weight rating for a trailer tongue, and your bikes are not static. Two bicycles sitting a foot behind the receiver put leverage on that joint that a tongue never does. Both of the racks below need a 2-inch receiver, and both need you to do this arithmetic before you order.
The lower rating wins. Your hitch has a capacity and the rack has a capacity. Whichever number is smaller is the one you live by, and the rack's own weight counts against the hitch rating before a single bike goes on. There is no scenario where the answer is "it'll probably be fine." Check the door jamb sticker too, because tongue weight is part of your vehicle's payload.
Tray or hanging: the decision that matters
Hanging racks carry bikes by the frame, with arms or hooks that the top tube rests on. Tray racks carry each bike by its wheels, sitting in cradles with a strap over each rim.
Hanging racks exist for one good reason: they pack more bikes into less space and they cost less. Four bikes on a hanging carrier take up less room behind the car than four bikes on trays, and for a family hauling kids' bikes to the trailhead on a Saturday, that is a legitimate answer.
They also have real limits. The frame takes the load, which rules out carbon, full stop. A step-through frame has no top tube to hang from, and a fat-tire or e-bike is too heavy and too wide for most hook designs. On top of that, bikes hang close together, so frames and pedals contact each other, and the whole assembly sways as a unit in crosswinds.
Tray racks solve all of it. Nothing touches the frame, wheel straps hold each bike independently, and loading in the dark becomes a matter of dropping a wheel into a cradle you can feel with your hand. The tradeoffs are weight, cost, and usually a two-bike ceiling.
The two racks that fit a 2-inch receiver
Both of these mount to a 2-inch receiver, and they sit at opposite ends of the same decision. One is built for heavy bikes that need cradles. The other is built to move four bikes at once. Read the capacity math on both before you decide, because the number on the rack is not the number your hitch can take.
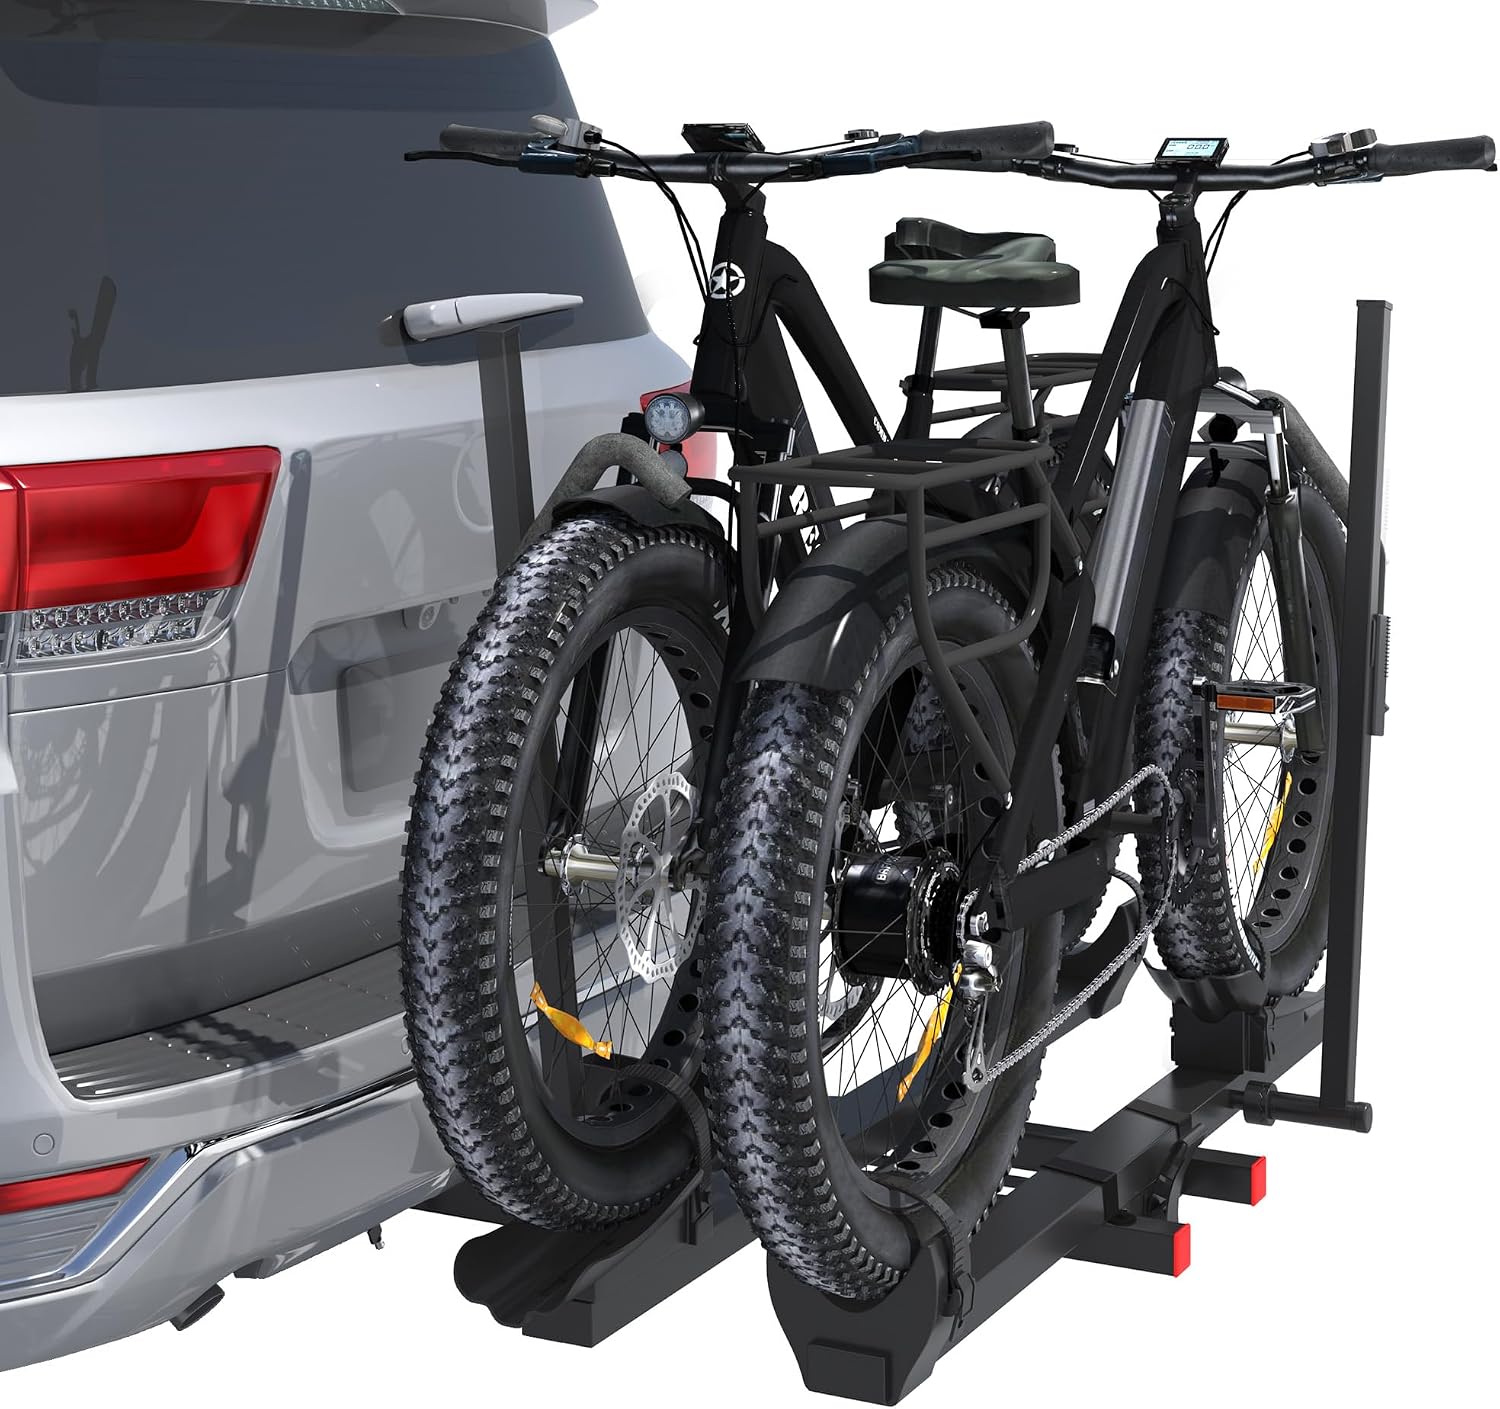
Best for e-bikes and fat tires: Bike Rack for Car,200lbs Capacity for 2 E-Bike with Anti Theft Lock Foldable Tilt Design Hitch Bike Rack,Up to 5-Inch Fat Tire for 2'' Receiver
 Visit on Amazon →
This is the rack I would point a two-e-bike household toward. The 200-pound capacity is the headline, and it is the number that matters, because two loaded e-bikes is a genuinely heavy load and most two-bike racks are not rated for it. The cradles accept tires up to 5 inches wide, which means fat bikes actually sit down in the tray instead of perching on top of it, and that alone eliminates the wobble you get when a 4.8-inch tire is squeezed into a standard cradle.
Two features earn their place on the spec sheet. The anti-theft lock handles the rack-to-bike security question, and the foldable tilt design lets you drop the whole assembly away from the hatch without unloading. Anyone who has stood in a grocery store parking lot trying to open a tailgate around a loaded rack understands why that matters. Tilt clearance is not a luxury feature. It is the difference between using the rack weekly and dreading it.
Flaws but not dealbreakers: It fits a 2-inch receiver only, so measure before you buy. Two bikes is the ceiling, so a family of four is looking at a second vehicle or a different rack. And with two e-bikes aboard, do the tongue weight math on your own hitch rather than trusting the rack's capacity alone.
Check current Amazon price, and confirm your receiver size before you order.
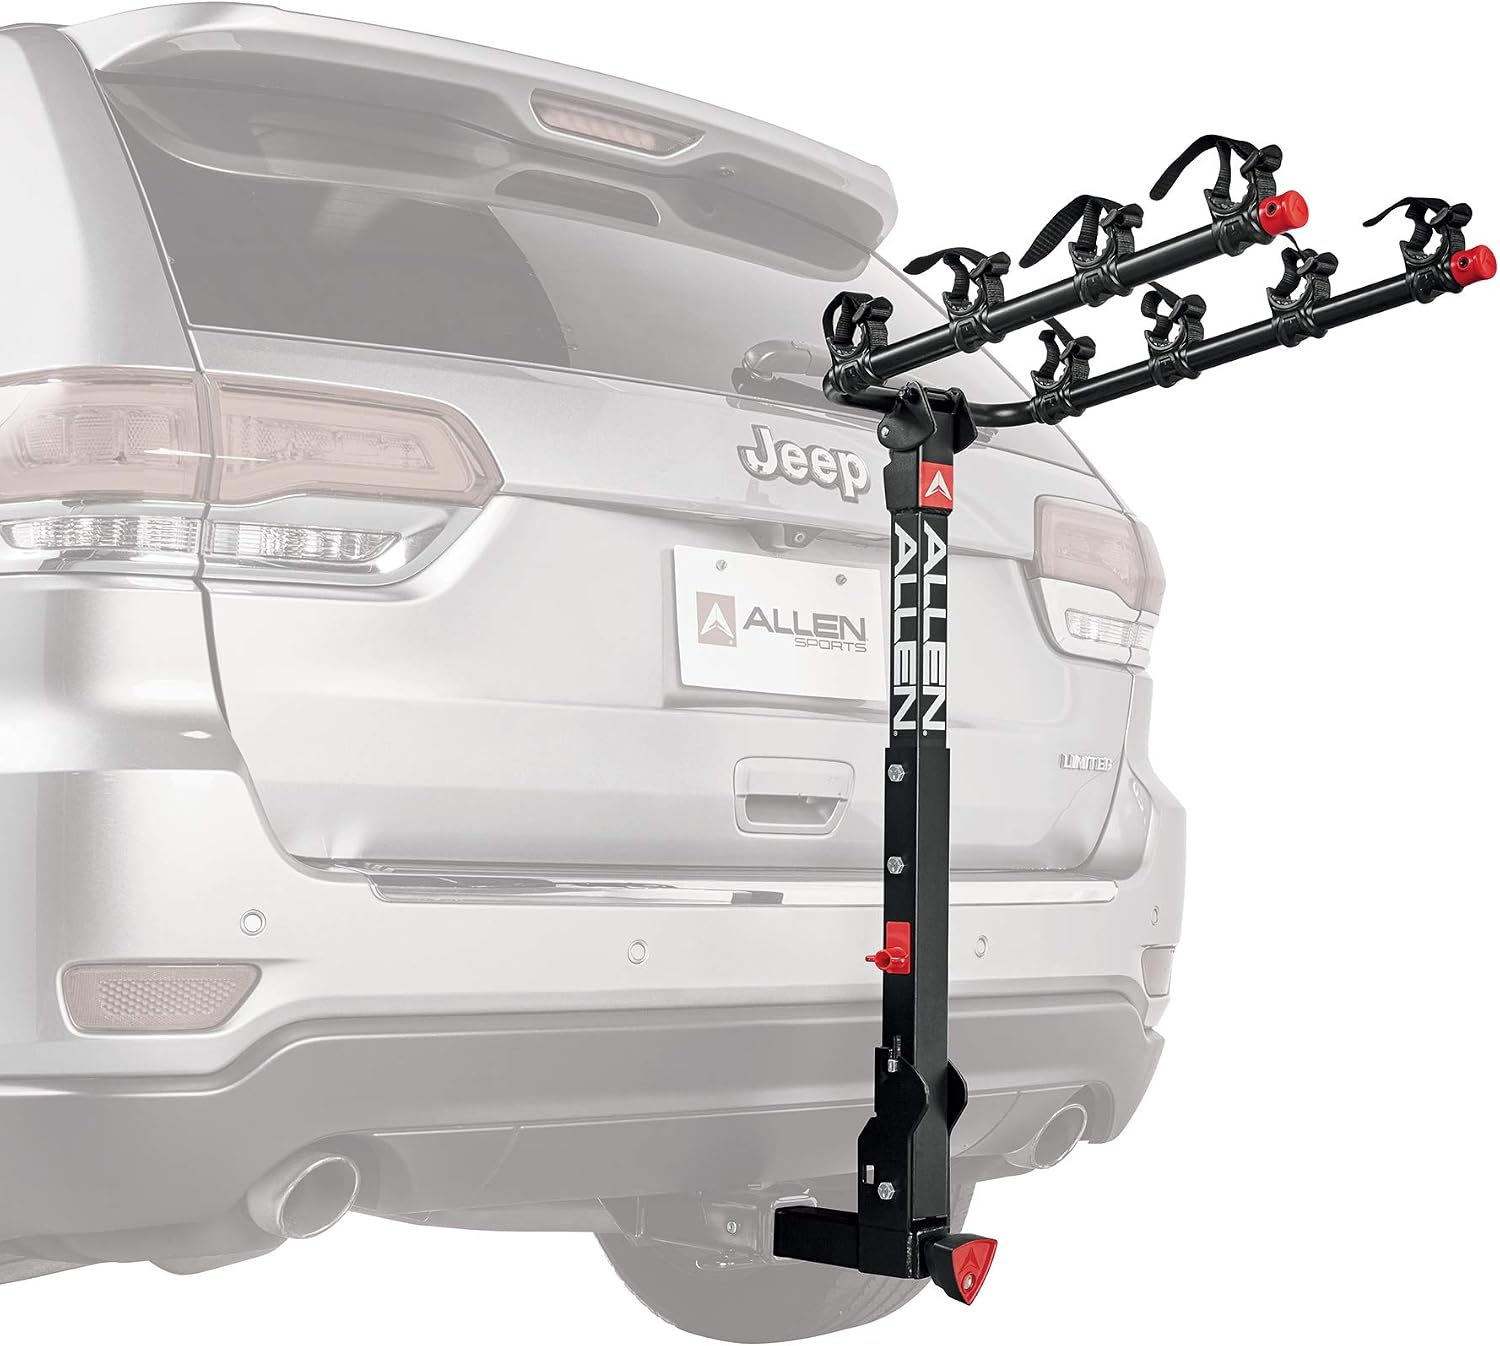
Best when four bikes need to go: Allen Sports Deluxe+ Locking Quick Release 4-Bike Carrier for 2 in. Hitch, Model 840QR, Black
 Visit on Amazon →
Four bikes on one carrier with a 2-inch hitch requirement and a locking quick release is a specific tool for a specific job: getting the whole family's bikes to the trailhead without two cars. The quick release means the carrier comes off the hitch when you are not using it, which matters more than people expect, because a rack left on through a Colorado winter is a rack with a seized pin by April.
The locking quick release also answers the parking lot question. A rack that pins to the hitch without a lock walks away. This one does not.
Flaws but not dealbreakers: This is a hanging-style carrier, and that shapes everything about how you use it. Carbon frames are off the table, step-through frames are awkward, and e-bikes are too heavy for the hook design. Bikes hang close together, so you will use the anti-sway provisions or you will listen to pedals clack against frames for four hours. It also sits in the airflow behind the car, so check that it does not block your brake lights and turn signals before your first trip, and plan on loading the heaviest bike closest to the vehicle.
Check current Amazon price and measure your receiver first.
Mounting and loading, step by step
The rack is half the job. The other half is the ten minutes you spend installing it correctly and the two minutes you spend checking it before every drive.
Step one: seat the rack and kill the play. Slide the shank fully into the receiver and use the threaded anti-rattle pin or bolt the rack came with. Hand snug, then a proper tighten. Play at the receiver is the number one source of highway rattle, and no amount of tightening the rack arms later will fix a loose shank.
Step two: load the heaviest bike closest to the car. On a hanging carrier this keeps the weight over the strongest part of the assembly. On a tray rack, load the position nearest the vehicle first, because that is the one you cannot reach once the outer cradle is occupied.
Step three: strap every wheel. Run the wheel strap over the rim, never through the spokes, and snug it until the wheel cannot roll. Snug, not racheted to the point of crushing. Carbon rims do not want a strap cranked down on them, and they do not need it.
Step four: manage sway. On a hanging rack, use the anti-sway straps or cradles so bikes cannot swing into each other or into your paint. On a tray rack, check that the cradles hold the tires firmly and that the arms are not contacting a frame anywhere.
Step five: test tilt clearance before the trip. Fold or tilt the rack away from the hatch in your driveway, with the bikes loaded, and confirm you can open the rear door. Doing this in a parking lot after a ride is how hatches get dented.
Step six: check your lights and camera. Walk to the back of the car with the rack loaded and look at the brake lights and turn signals. If the rack covers them, add a light bar. Your backup camera will also be looking at a rack for the rest of the trip, which is normal and worth knowing before you back into a garage.
Step seven: re-check after ten miles. This is the step nobody does. Stop, feel the receiver joint for movement, and check every strap. Then re-check at every fuel stop and after any stretch of rough road. Things settle. Checking takes ninety seconds.
Step eight: lock both ends. Lock the rack to the hitch and lock the bikes to the rack. A rack that uses one key across four bikes is not real security. Run a separate cable through the frames and wheels and lock it to the rack itself, and keep those keys in the car, not in a bag on the rack.
Step nine: pull the rack between seasons. If you can store it inside over winter, do it. If you cannot, grease the hitch pin and the threads, because a seized pin in spring turns a five-minute job into an hour with a breaker bar.
The mistakes that cost people bikes
The most expensive mistake is buying for the car you own instead of the bikes you will own in two years. A cheap hanging rack is fine until someone in the house buys an e-bike, and then it is a rack you cannot legally or safely use.
The second is adapter sleeves. If your vehicle has a 1.25-inch receiver and you are bolting on a sleeve to run a 2-inch rack, you have added a moving joint between your bikes and your frame. It works. It also moves.
The third is trusting "fits all vehicles" as a specification. It means the shank is 2 inches wide. It says nothing about your tongue weight, your hatch clearance, or whether your brake lights stay visible.
The fourth is loading in the dark with no plan. Keep a headlamp in the glovebox and load the same way every time, in the same order. A consistent routine is what makes a two-minute load possible at 9 p.m. in a trailhead lot.
The bottom line
Pick the receiver size first, do the tongue weight arithmetic second, and only then decide between cradles and hooks. If your household rides e-bikes or fat bikes, the answer is the 200-pound capacity carrier with 5-inch cradles and a tilt design. If four lighter bikes need to move on one vehicle, the Allen Sports four-bike carrier with the locking quick release is the tool.
Either way, mount it tight, strap every wheel, check it after ten miles, and lock both the rack and the bikes. A hitch bike rack is only safety equipment when it is installed like safety equipment. The rest of the time it is just a very expensive way to lose a bike at highway speed.
That is the job. Do it once, check it every time, and go ride.