A trunk mount bike rack is the cheapest way to carry two bikes, and the fastest way to cost yourself a paint job. It hangs off the trunk lid and rear glass on six straps, which means it fits almost any sedan or hatchback, and it also means the entire rack depends on how carefully you tighten those straps. Do it right and you get a stable, removable rack for the price of a decent set of tires. Do it wrong and you get a rack that walks across your trunk lid at 70 mph.
I have run trunk racks on and off for twelve years, and I will be straight with you: this is the rack category I recommend least. It is also the category most people actually buy, because it is the only one that needs no hitch, no roof bars, and no permanent hardware. So here is the install and load sequence I use, plus the two trunk racks I would be willing to put on a car.
Budget fifteen minutes the first time you mount one. After that, once you know where your car's mounting points are, it is a five minute job.
Why you should trust me
I am a road and gravel cyclist in Boulder, Colorado. I commute, I race crits, and I drive to the mountains most weekends with two bikes on the back. In twelve years I have owned eight racks, and I have made most of the mistakes you can make with them.
The first trunk rack I owned took a strip of clear coat off the rear quarter panel because I hooked a bare metal strap end onto painted steel and left it there for a season. The hanging rack after that swung into a highway divider on a windy pass because I never re-tensioned the straps after the first stop. The tray rack I run now survived a deer strike, which is not a recommendation I expected to be able to make about anything.
That history is why I am honest about trunk racks. I am a hitch person. I think a hitch tray rack is safer, faster to load, and better for your paint. But I also know that not everyone has a receiver, and a trunk rack used correctly on the right bike is genuinely fine. The trick is knowing which car, which bike, and which five habits.
How I picked and how I tested
I did not pick these by reading a spec sheet. I picked them by checking the things that actually decide whether a trunk rack survives a highway drive.
First, strap count and strap width. Six straps is the floor for a two bike rack. Four is a rack that will move. Wider webbing holds tension longer and does less damage when it rubs.
Second, hooks. Vinyl coated hooks are non negotiable. Bare metal hooks on a painted trunk lid edge will eventually mark the paint, no matter how careful you are.
Third, cradle padding. The arms that hold your top tube need soft, dense padding, and it needs to be the kind that does not slide down the arm after a season in the sun.
Fourth, the fit list. Every trunk rack ships with a vehicle fit guide, and it is model and year specific for a reason. Plastic trunk lids, spoilers, rear wipers, and glass hatch panels all change whether a rack can sit flat and stay put. I check the fit guide against the exact year of the car before anything else.
Fifth, what the rack blocks. Taillights, license plate, backup camera. A rack that hides your plate is a traffic stop waiting to happen, and a rack that blocks your camera turns every parking maneuver into guesswork.
Last, install time. This is a real spec. A rack that takes half an hour to mount gets used half as often as one that takes five minutes.
What I look at after mounting: whether the rack shifts when I push it side to side with an open hand, whether the trunk lid bows under strap tension, whether the bottom legs sit on the bumper skin or on something that flexes, and whether the side straps land on metal or on plastic trim that can pull loose. Those four checks tell you more than any marketing claim on the box.
The two racks worth strapping to a trunk
Both of these are two bike trunk racks. Neither one is what I would put under a carbon race bike, and I will get to why in a minute. But for a hybrid, a commuter, a kids bike, or a weekend cruiser, these are the two I would hand someone.
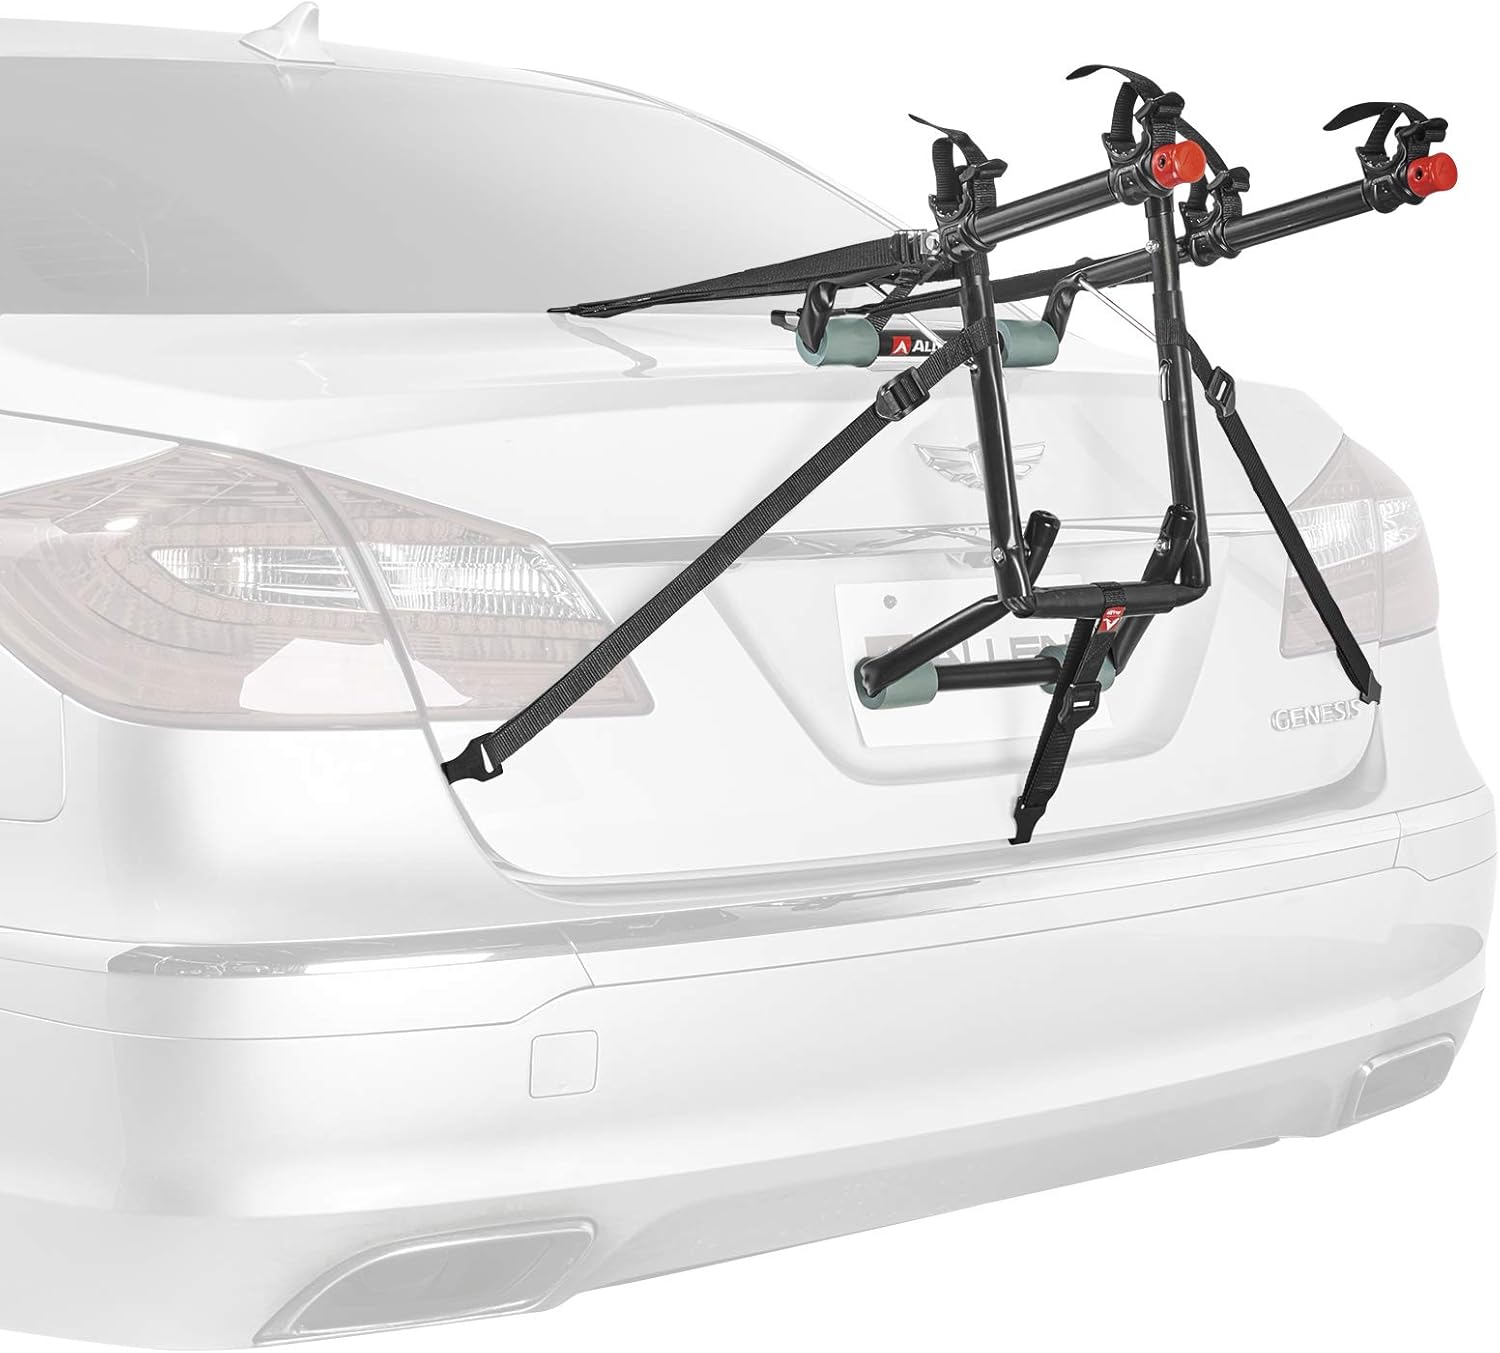
The occasional hauler pick: Allen Sports Deluxe 2-Bike Trunk Mount Rack, Model 102DN-R, Black
 Visit on Amazon →
This is the rack I point people to when they haul bikes four or five times a year and do not want to install a hitch. The 102DN-R is a two bike, strap mounted trunk rack with the padded arms and the side straps that you tighten down against the quarter panels. It folds down when it is off the car, so it lives in a garage corner instead of taking up a shelf.
Two things make it work in practice. The arms hold a top tube at a workable height, so you are not lifting a bike over your head, and the whole thing comes off the car in under a minute once the hooks are set. That matters more than any other feature, because the rack you leave on the car all summer is the rack that rubs your paint all summer.
Flaws but not dealbreakers: It is a trunk rack, so it blocks the plate and part of the taillights on most sedans, and there is no lock. On a long drive the straps will stretch and you will re-tension them at least once. Clean the trunk lid before you mount it, because grit trapped under the pads does the scratching, not the pads themselves.
This is the right rack for a rider with a $500 hybrid and a sedan with a steel trunk lid who wants to get to the trailhead twice a month.
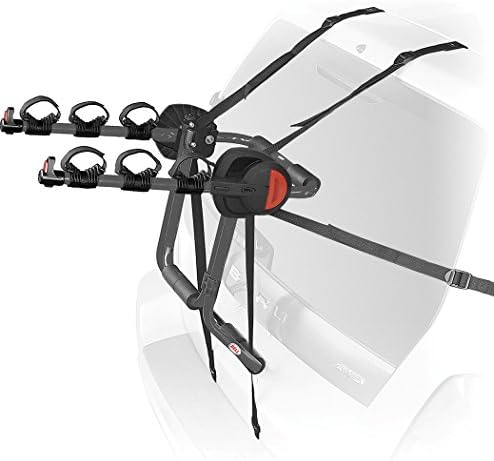
The sturdier pick: Bell Bike Trunk Rack
 Visit on Amazon →
The Bell is the one I would choose if the bike is heavier, the drive is longer, or the car has a trunk lid that flexes. The frame is the more substantial of the two, and the cradles and hooks are the parts I trust to hold tension on a hot afternoon when the straps are working hardest. If you are hauling a heavier hybrid, a cruiser, or a bike with a longer wheelbase, the extra rigidity is worth having.
It is still a trunk rack. That means the same rules apply: six straps, vinyl coated hooks, a clean trunk lid, and a re-check after the first ten miles. What you get here is a rack that feels less nervous when you push on it, and that is the difference between a drive where you forget the bikes are back there and a drive where you are watching the mirror the whole way.
Flaws but not dealbreakers: It is bulkier to store than the Allen, and like every strap rack it interferes with a backup camera. If your car has a plastic trunk lid or a spoiler, check the fit guide carefully before you order, because the legs need a flat surface to sit on.
This is the pick for a rider who hauls a heavier bike regularly and wants the rack to feel planted rather than adequate.
The install sequence, step by step
Do this on level ground, in daylight, the first time. After that you can do it in a parking lot.
Step one: clean the contact points. Wipe the trunk lid edge, the rear glass, and the bumper skin. Every scratch I have ever gotten from a trunk rack came from grit trapped between the pad and the paint.
Step two: find your mounting points before you tighten anything. The bottom legs sit on the bumper or the lower trunk edge. The top hooks go over the trunk lid edge onto metal. The side hooks go on the quarter panel lip or the hatch edge. If a hook is landing on plastic trim or on glass, move it. Set the rack in place dry, with everything loose.
Step three: hook the top straps first. Those carry most of the load. Then the bottom legs, then the side straps. Do not tighten as you go. Get all six hooked with slack in them.
Step four: tighten in a star pattern. A few turns on one strap, then a few turns on the strap diagonally opposite, and work your way around. Tightening one strap all the way down first pulls the rack crooked and puts all the load on one hook.
Step five: stop at the right tension. Push the rack side to side with an open hand. It should not shift. If the trunk lid is bowing inward under the straps, you are past the point where more tension helps. Back off a turn.
Step six: protect the paint at the hook points. If the hooks are vinyl coated, you are fine. If you want belt and suspenders, a small square of paint protection film under each hook costs almost nothing and saves a lot of regret.
Step seven: check your lights and plate. Stand behind the car. If the plate is unreadable or a taillight is more than half covered, reposition the rack or add a light bar. This is not a detail.
Loading bikes so nothing shifts at highway speed
Put the heavier bike in the cradle closest to the car. The arm nearest the trunk carries less leverage, and the whole assembly moves less when the weight is forward.
Set the top tube into the cradle, then run the cradle straps snug, not crushing. If you ride a step through frame or a bike with a sloping top tube, you need a top tube adapter, which is a small bar that clamps to the seatpost and the head tube and gives the rack a level tube to grab. Without one, the bike hangs at an angle and the straps never sit right.
Then strap the wheels. A wheel strap around each rim to the rack frame is what stops the bike from swinging sideways when you take a corner. This is the step people skip, and it is the step that matters most.
Watch clearances: pedals near the bumper, handlebars near the rear glass, brake levers near the trunk lid. Turn the front wheel slightly if you need room. If a pedal is close to paint, pull the pedal or wrap the crank arm.
The five minute check before every drive
Walk to the back of the car and do this in order. Push the rack side to side. Push each bike side to side. Check that the cradle straps are still snug. Check the wheel straps. Look at the plate and the taillights. Check the mirror view from the driver's seat.
Then drive ten miles and do it again. Straps stretch on the first drive, especially in the heat or the rain. After that, re-check at every stop on a long trip. A trunk rack that was perfect in your driveway can be loose by the second hour.
When a trunk rack is the wrong tool
I will not put a trunk rack under a carbon frame. Hanging a carbon top tube in a padded cradle is a load path the frame was never designed for, and a clamp that is fine on aluminum can be a crack on carbon. If you ride carbon, you want a tray rack, full stop.
The same goes for any bike over about $800. The math is simple: the rack costs a fraction of the bike, and the failure mode is the bike on the highway.
Skip a trunk rack entirely if you have a plastic trunk lid, a large spoiler, a rear wiper that interferes, or a step through frame you do not want to put an adapter on. Skip it for e bikes and fat bikes, which are too heavy and too wide for this category. Skip it if you need to carry more than two bikes, because stacking three on a strap rack is how racks fail.
In all of those cases, a two inch hitch and a tray rack is the answer. It costs more, it takes an hour to install once, and it is safer every single time after that.
What this all costs
Both of these racks sit at the low end of the rack market, which is exactly why they sell. There is no receiver to install, no wiring, and no shop time. The rack is the entire purchase.
Budget for a few extras. A top tube adapter if you have a step through or a sloping frame. A couple of squares of paint protection film for the hook points. A cable lock, because neither rack has one and a rack full of bikes at a trailhead is an easy target. None of it is expensive, and all of it extends the life of the rack and the car.
Then do the math on use. If you haul bikes four weekends a year, a trunk rack is the sensible buy, and the install sequence above is the difference between a rack that lasts five seasons and a rack that leaves a mark you will see every time you walk past the car. If you haul bikes twice a month, put the money toward a hitch and a tray. That is the honest answer, and it is the one I give my own club.
Whichever way you go, the habits are the same: clean the contact points, tighten in a star pattern, strap the wheels, and check the whole thing ten miles down the road. That routine is free, and it is worth more than any feature on the box.