Most people searching for a trunk bike rack setup already own the rack. It is leaning against the garage wall with a tangle of straps hanging off it, and it goes on the car maybe twice a summer for a trip to the trailhead. The question is not which rack to buy. The question is how to get it on the car, get two bikes onto it, and get everything back into the garage without scratching the paint or burning an hour in the driveway.
I am a hitch rack person by default. Tray racks on a 2 inch receiver are what I run on my own cars, and I will say plainly that a trunk rack is the wrong tool for a carbon race bike, an e-bike, or anything you paid real money for. But a trunk rack is also the cheapest way to carry two bikes on a car with no hitch, and for a lot of riders it is the difference between riding on Saturday and not riding at all.
So this is what I do when a friend shows up with a boxed trunk rack and a garage full of bikes. The car side gets mounted properly, the bikes get loaded in a fixed order, and the garage gets a spot for the bikes so the rack is not buried under three of them when you need it.
Why you should trust me
I have owned eight bike racks in twelve years. There was the trunk strap rack that cost me a patch of clear coat on a previous car, the hanging rack that swung into a highway divider with two bikes on it, and the tray rack that survived a deer strike at speed. I live in Boulder, I commute by bike, I race crits, and I drive to the mountains most weekends with bikes on the back.
I do not have a shop, a lift, or a sponsorship. I am a rider who has made most of the mistakes available in this category, and I keep two numbers in my head for every rack I touch: how long the mount takes, and how long it takes to load a bike in the dark after a long ride. Those two numbers decide whether a rack gets used or rots in the garage.
How I picked what is here and what I check before anything touches paint
The two products below are not competing with each other. One is the car side of the job and one is the garage side, and both are the affordable end of their category on purpose. If you are hauling four bikes every weekend on a 2 inch hitch, this is not your article and you should be looking at tray racks. If you own two bikes, park outside, and ride a few times a month, this is the whole setup.
Before a rack goes near a car, I check the same list. Are the hooks vinyl coated or bare metal? Are the feet padded, and what happens when grit works under that pad? Do the side straps have enough length for your hatch or trunk lid, and do the hooks have a shape that will not bend out under tension? Where do the bottom feet land, on metal or on glass? Does the rack block the brake lights, the plate, or the backup camera? Can one person mount it without tools, in the dark, in a parking lot?
Those checks are the reason I am careful about recommending trunk racks in general. A rack that scores well still has limits, and the limits are what you need to know before you load a bike.
The two pieces this job needs
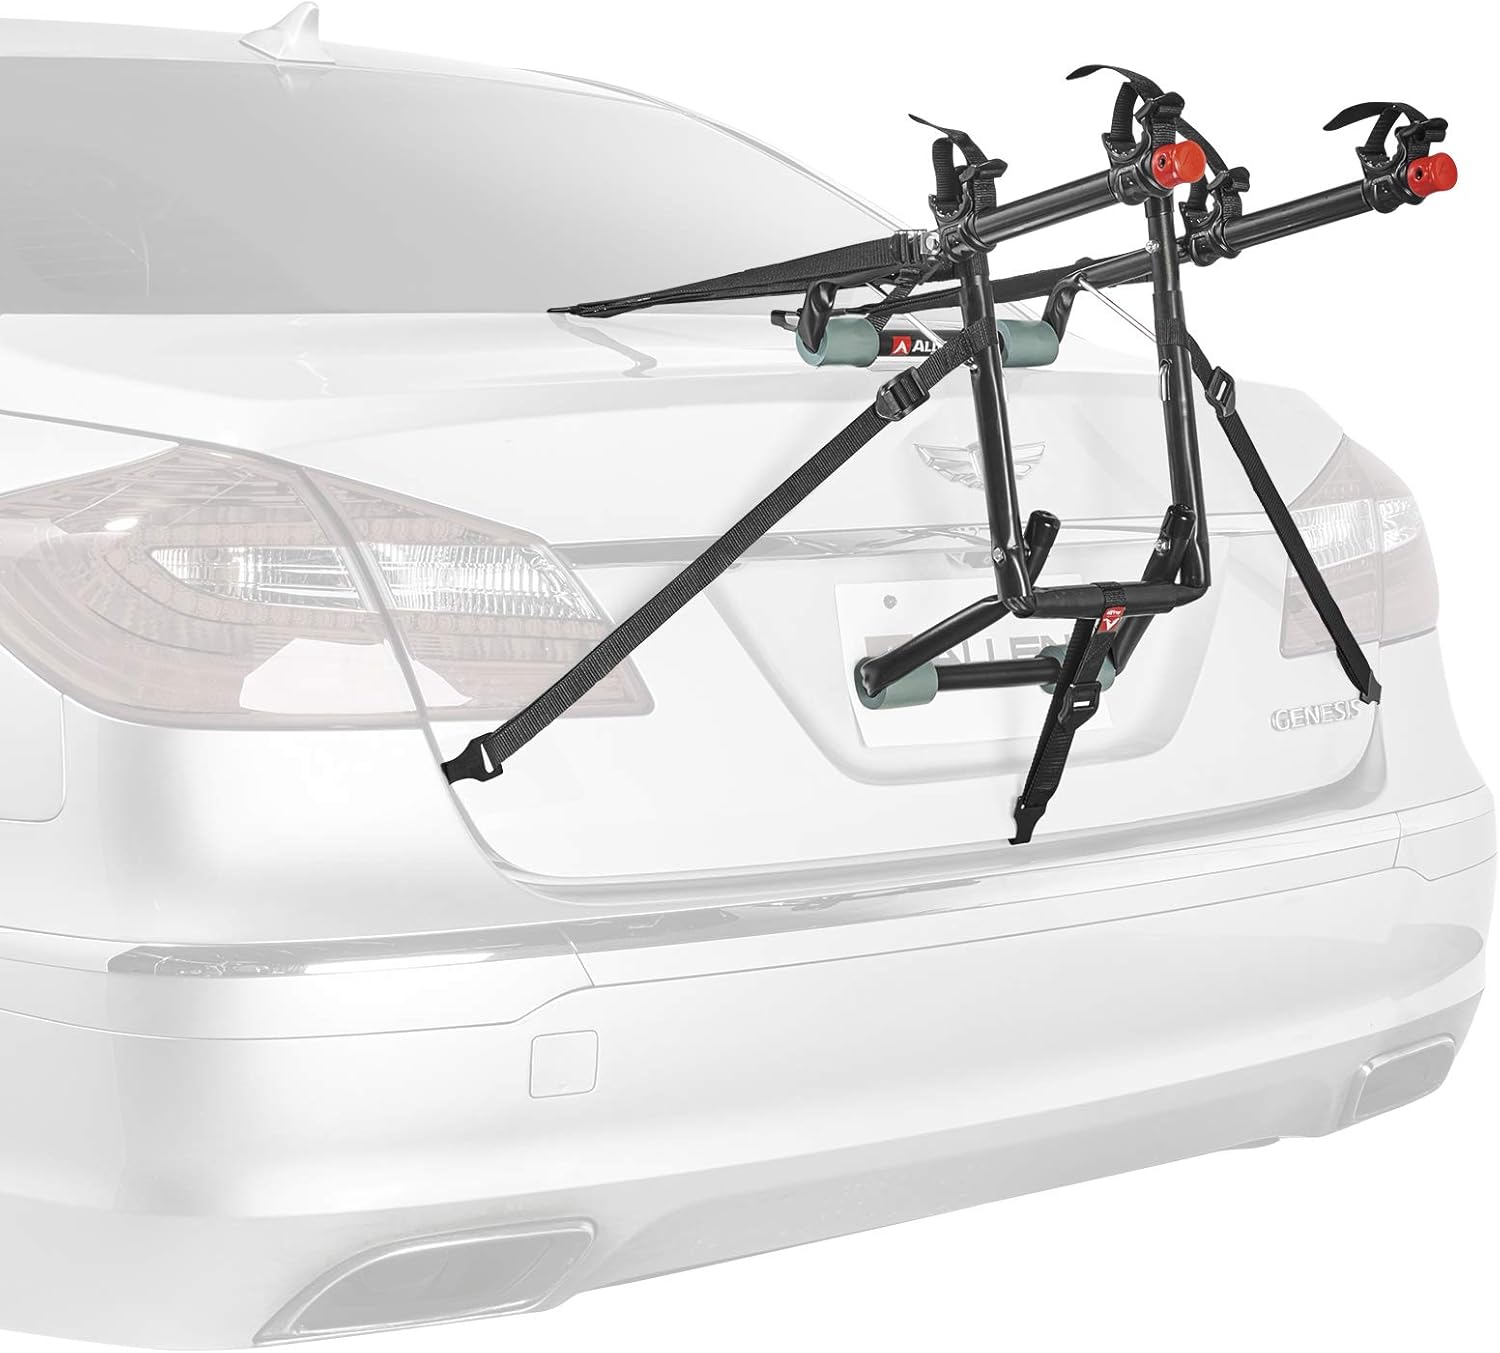
The car side: Allen Sports Deluxe 2-Bike Trunk Mount Rack, Model 102DN-R, Black
 Visit on Amazon →
This is the classic first rack: two bikes, strap-mounted to a trunk or hatch, no hitch required. Check current Amazon price. It carries two bikes on cradles that hang them by the top tube, which is the configuration I trust least and also the configuration that costs the least, and for a pair of aluminum hybrids or kids bikes on a 20 minute drive to the trailhead, that trade is fine.
What I like about this class of rack is the simplicity. There is no receiver to install, no torque spec, no wiring. What I do not like is everything the straps touch. The hooks and the feet are where paint gets hurt, so read the section below on contact points before you mount it, and understand that this rack wants a car with a normal trunk or hatch and a metal lip for the top hooks.
Flaws but not dealbreakers: It hangs bikes by the frame, so it is off the table for carbon. It will block the taillights on some sedans, which means adding a light bar for night driving. The straps need re-tensioning after the first few miles, every trip, no exceptions.
Anyone with a sedan or hatchback, no hitch, and two bikes under the price of a nice wheelset will get years out of this rack if they mount it correctly.
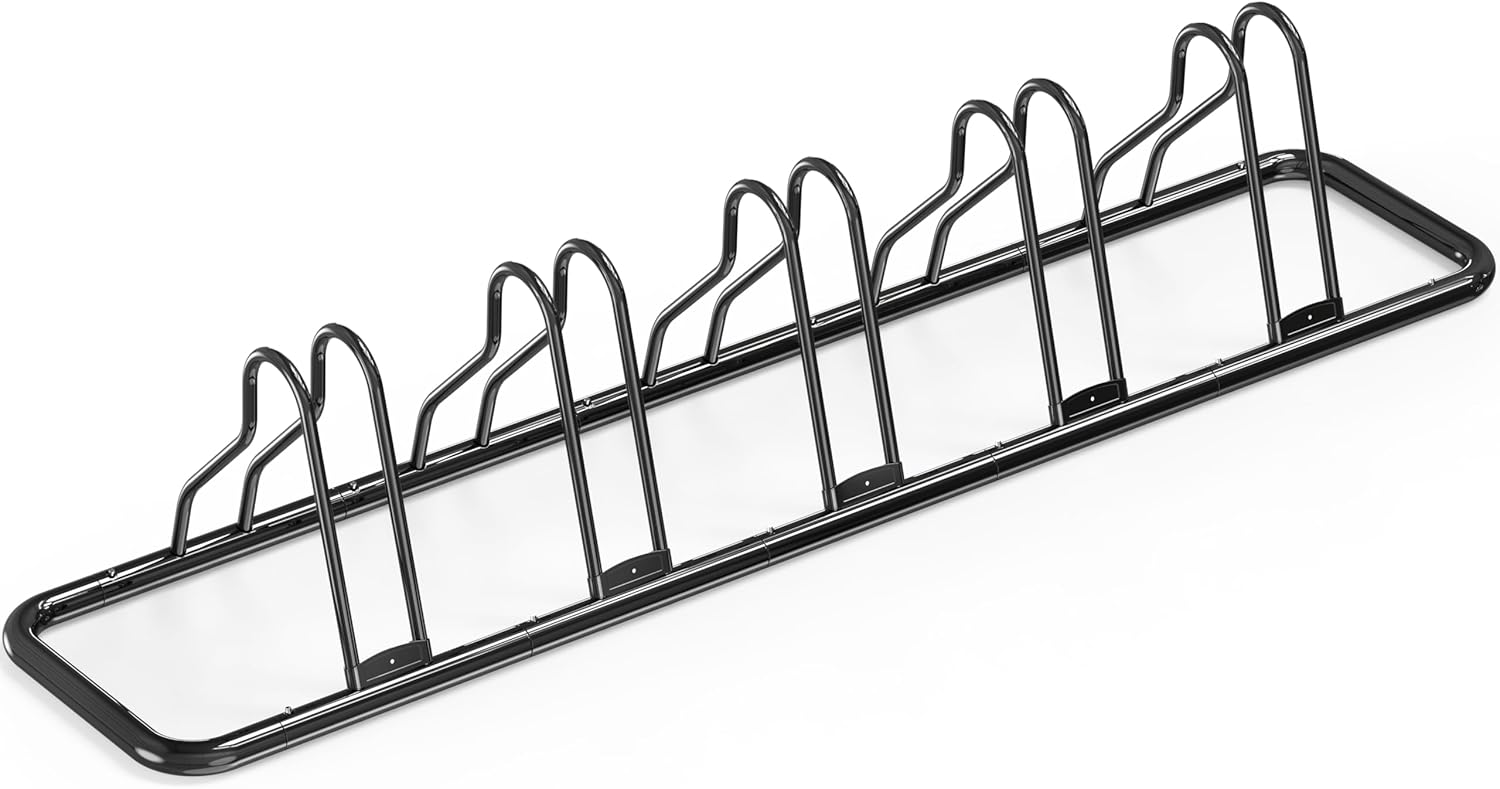
The garage half: Simple Houseware 5-Bike Adjustable Floor Storage Rack for Garage, Black
 Visit on Amazon →
Check current Amazon price. This is the piece that makes the car rack usable, and I mean that literally. When bikes live leaning against the garage wall, the trunk rack ends up on the floor under them, and mounting it becomes a 20 minute excavation before you even start. A floor rack holds five bikes upright in a row so you can walk in, pull one out, and get to the rack.
The adjustability matters more than the bike count. Kids bikes, adult road bikes, and a mountain bike with wide bars all need different spacing, and you want to be able to set the arms before the bikes go in, not fight them after. It also keeps wheels off the ground, which means fewer flat spots and fewer bent rotors from a bike falling over onto another bike.
Flaws but not dealbreakers: It is a floor rack, so it takes footprint. If your garage is tight, measure before you commit. A heavy e-bike is more weight than I would want hanging on a light rack like this, so keep the e-bike on the ground and put the pedal bikes up.
Anyone with a family's worth of bikes and a wall that is already full will find this solves more problems than it creates.
Mounting the trunk rack: the sequence
This is the part that decides whether you scratch your car. Follow the order.
Step one: Check the car, not the rack. Read your owner's manual for anything about carrying loads on the trunk lid. Look at what the top hooks will grab. A metal trunk lip is good. A plastic spoiler, a glass hatch, or a lid with a thin rolled edge is a problem, and no amount of careful strap tension fixes a bad attachment point.
Step two: Clean the contact points. Wash the trunk lid and the bumper area, then wax it or apply a piece of paint protection film where the pads and hooks sit. Grit under a vibrating pad is sandpaper. This step takes four minutes and it is the difference between a rack you can use for a decade and a rack that leaves a haze in the clear coat.
Step three: Assemble on the ground. Set the cradle spacing and the arm angles before the rack goes anywhere near the car. Doing this with the rack already hanging off the trunk, in the wind, is how people drop a hook onto a rear window.
Step four: Dry fit with the trunk open. Hold the rack in position with the lid up and see where the top hooks want to land and where the bottom feet touch down. You are looking for feet on metal or on a bumper cover, not on glass, and for a rack that sits level rather than cocked to one side.
Step five: Hook in order. Top hooks first, then the side straps, then the bottom straps. The top hooks carry the bikes, the side straps control sway, and the bottom straps stop the rack from walking. If you reverse that order you will chase the rack around the trunk lid.
Step six: Tension properly. Snug the straps until the pads compress slightly, keep every strap flat with no twists, and stop before the hooks start to bend or the panel starts to flex. Then push on the rack by hand. If it shifts, it is not tight enough. If the lid panel moves with it, it is too tight.
Step seven: Load in order. First bike goes in the cradles closest to the car, handlebar turned away from the paint, pedals positioned so they cannot contact the car or the second bike. Second bike goes outside it, with its handlebar turned the other way. Use the tie-downs that came with the rack, and add a bungee or a strap from the rack frame to the seatpost or saddle rails as insurance. Check that no brake lever, pedal, or bar end is touching paint.
Step eight: Lights, plate, camera. Walk to the back of the car and look. If the rack and bikes hide the brake lights, add a light bar. If the plate is covered, relocate it or accept the risk knowingly. Check the backup camera and the mirror view before you put the car in gear.
Step nine: The first stop rule. Ten minutes into the drive, pull over and check every strap. Then check again at the first fuel stop and any time you have been on rough pavement. Straps stretch, pads settle, and a rack that was tight in the driveway is often loose on the highway.
Setting up the garage so the rack gets used
Step one: Pick the spot and measure. Measure your longest bike and add walking room on both sides. You want to be able to walk the bike in and out without rotating it, and you want the rack out of the swing path of your car doors.
Step two: Build it loose, then set the arms. Assemble the frame, but leave the arm adjustments loose until you have the bikes on hand. Set the spacing to match your actual fleet, not a photo on the box.
Step three: Load by frequency, not by size. The bike you ride most goes on the end where you can reach it without moving anything. The race bike or the occasional bike goes in the middle.
Step four: Alternate handlebars. Face handlebars in opposite directions down the row. It buys you real width back in a narrow garage and it keeps bar ends from tangling with brake levers.
Step five: Check stability with a nudge. Push each bike sideways at the saddle and see if the rack walks. If the floor is smooth and sealed, a rubber mat underneath settles it down. Keep the loaded rack away from anywhere a car bumper can reach it.
Step six: Park the car rack on the wall. Hang the trunk rack on a hook above the floor rack, straps coiled, so the garage side and the car side never fight each other for the same square footage.
Where a trunk rack is the wrong answer
I will not recommend a trunk rack for a bike over a few hundred dollars, and here is where that line sits. Carbon frames are out, because hanging a frame by its top tube to a strap-mounted rack is asking for a crushed tube, and straps across carbon rims or fork legs are worse. E-bikes are out because the weight is beyond what straps and cradles are meant to hold. Glass hatches and spoilers are out because there is no honest attachment point. And if your car already has a hitch, or you are willing to have one installed, a tray rack is the better answer in every way that matters: no paint contact, no strap tension ritual, and a much shorter load time.
Roof racks are not something I write about, and this is not the article for them. RV and fifth-wheel setups are a different set of physics entirely. If you are in either of those worlds, get advice from someone who runs them.
What this all costs
Neither of these pieces is expensive, and that is the point. Check current Amazon price on the car rack and on the floor rack, add them together, and then divide that number by the number of times you will mount the rack over the next five years. For most people who ride a few times a month, that is pennies per trip. The expensive version of this story is the one where the rack is buried, the bikes are tangled, and you skip the ride because getting ready takes longer than the ride itself.
The time math is the one that surprises people. A rack that mounts in six minutes gets used. A rack that takes 30 minutes, because the straps are knotted and the bikes are in the way, gets used half as often. The floor rack is what buys you the six minutes.
That is the whole system. Two bikes, one rack on the car, one rack on the floor, straps coiled and hooks clean. Do it once, in this order, and the setup stops being a project and starts being equipment.