Half the racks I pass on the highway are mounted wrong. Not cheap racks, not badly built racks, just racks bolted on with a loose hitch pin and a strap that walks itself toward the exhaust over two hundred miles of interstate. A hitch and truck bed bike rack solve the same problem from two directions, and both of them live or die on the same three things: how the rack attaches to the vehicle, how the bike attaches to the rack, and whether the whole assembly still feels planted at 75 mph.
I have owned eight racks in twelve years. One was a trunk strap rack that scratched the paint on a leased hatchback and cost me more at turn-in than the rack cost new. One was a hanging rack that swung into a highway divider on a windy pass. One was a tray rack that survived a deer strike, which is the only reason I still trust the category. I measure installation time in minutes, wobble in how much the handlebars move at speed, and loading time in how long it takes me to get a bike on the rack in the dark after a long ride.
The fix here is not a purchase. It is a workflow.
Why you should trust me
I ride road and gravel out of Boulder, Colorado, I commute on the same bikes I race, and I take them into the mountains most weekends. That means my racks get mounted and unmounted constantly, in cold, in rain, in the dark, with a headlamp in my teeth.
I am a hitch person. I do not review roof racks, and I do not review RV or fifth-wheel setups, because the wind and weight physics are different enough that my experience does not transfer. What I do know cold is the receiver interface, the anti-wobble hardware, the strap routing, and the clearance question that decides whether you can open your hatch with a bike loaded.
I also know the failure modes. Straps that scratch carbon rims. Tilt features that only work with an empty rack. Locks that use one key for four bikes. Racks that rattle at 65 no matter how hard you tighten the pin. Those are the things this workflow is designed to eliminate.
How I picked and how I tested
I do not have these two units in my garage, so I am not going to pretend I ran them at 75 mph on a Tuesday. What I did was run both against the checklist that predicts whether a rack survives a season, and that checklist is short.
The vehicle interface. Does the rack clamp or bolt to something structural, and does it have hardware that resists rotation once it is tight? A rack that depends on friction alone will rotate in the receiver on the first hard brake.
The capacity math. Rated capacity is a ceiling, not a target. If a rack is rated to 150 pounds, that is the total of every bike plus the rack's own moving hardware, and it assumes the bikes are distributed evenly. Four bikes at 37 pounds each is a very different load than four bikes at 50 pounds each.
The load path. A bike should be held at the wheels or the frame by something that cannot loosen on its own. Anything that relies on a single strap tensioned by hand is a maintenance item, not a mount.
The clearance question. Can you open the tailgate or the hatch with bikes loaded, and can you get into the bed with the rack in place?
Everything below is judged on those four things, plus the one that matters most to me personally: whether a carbon frame can go on it.
Hitch or truck bed: pick your platform first
If you drive a car, crossover, SUV, or minivan, you are buying a hitch rack. Full stop. That is what a receiver is for, and it is the only mounting point on those vehicles that is designed to carry a cantilevered load.
If you drive a pickup, you have a real choice, and the answer depends on what else you do with the truck. A bed rack keeps your receiver free for a trailer, keeps the load inside the footprint of the truck, and puts the bikes behind the cab where they are out of the wind. The tradeoff is bed access and whatever tonneau or bed cover you already own.
Two conflicts to check before you buy either one. A hitch rack and a trailer cannot share a receiver without an extension, and extensions add leverage and wobble. A bed rack and a hard tonneau cover usually cannot coexist without a track system. Figure out which one you actually use before you spend anything.
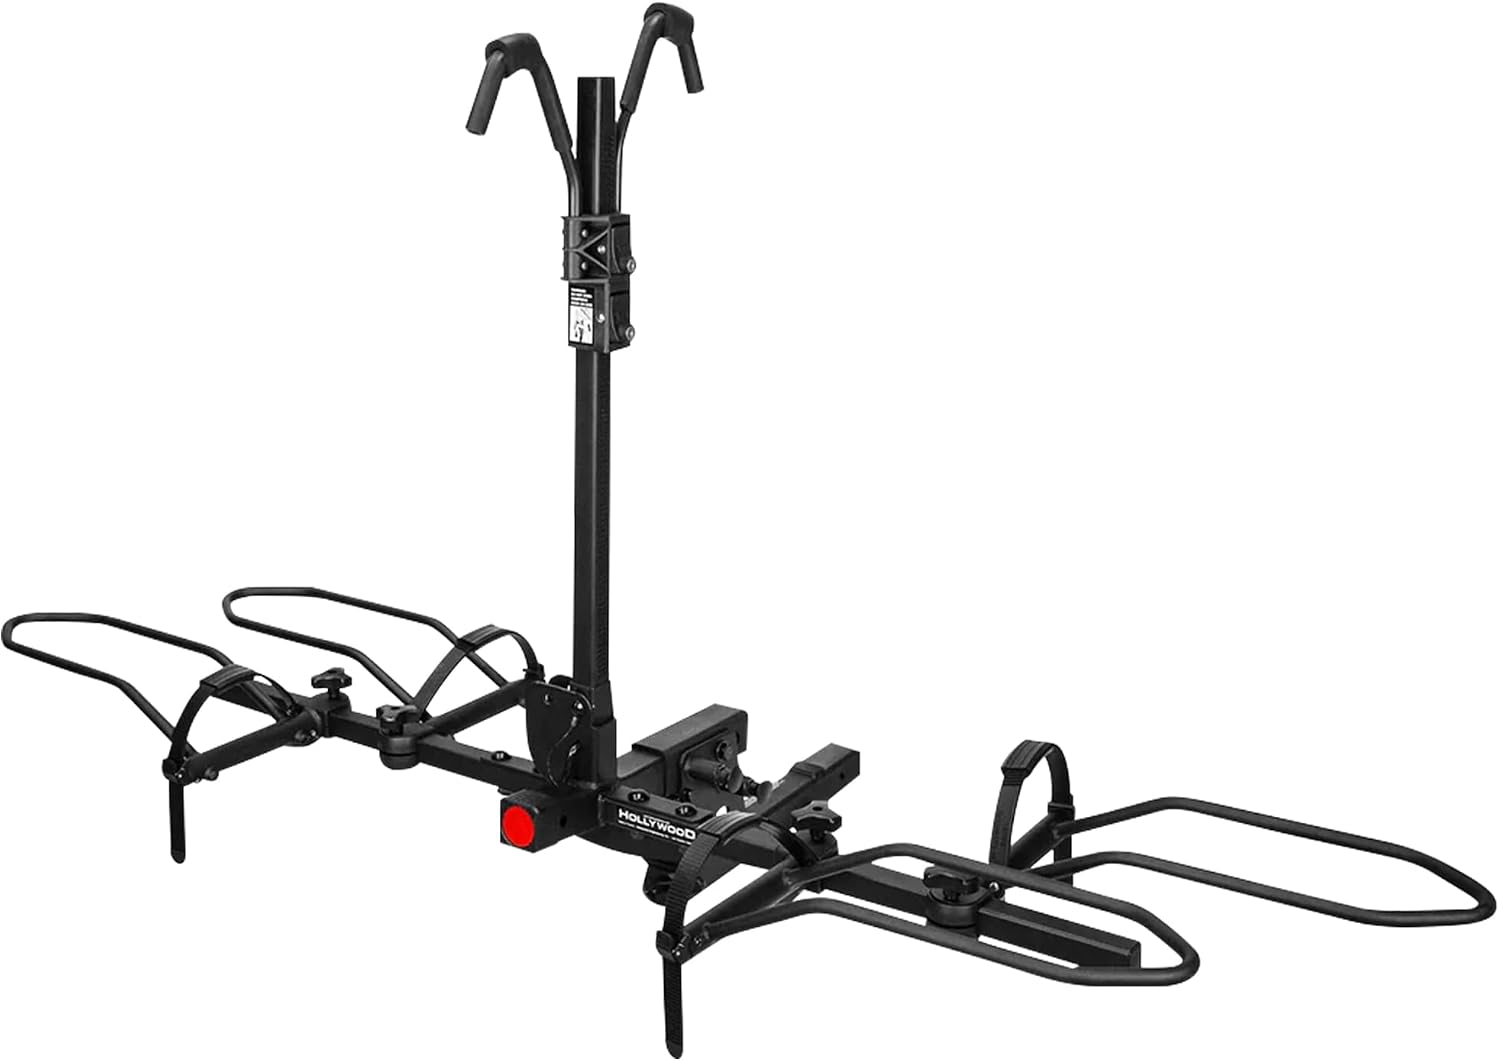
Hitch-mount pick: MaxxHaul Hitch Mount 4 Bike Rack 150 lb Capacity Heavy-Duty Swing Down Design Fits Cars Trucks SUVs and Minivans with Safety Reflector Easy Install (70210)
 Visit on Amazon →
This is the four-bike hitch rack for people who haul a mix of bikes and want to get into the back of the vehicle without unloading first. The swing-down design is the feature that earns its keep: you drop the rack away from the hatch or tailgate, get your gear out, and swing it back up. Without that, every grocery run turns into a negotiation with a loaded rack.
The 150-pound capacity is the number to respect. Divide it by four and you get a working average of 37.5 pounds per bike, which covers most aluminum and steel mountain bikes, hybrids, and kids' bikes, and does not cover four e-bikes or four loaded touring rigs. Add the safety reflector and the easy-install hardware and you have a rack aimed at the household that hauls a family's worth of bikes on weekends rather than a race team's worth of carbon.
Check current Amazon price before you commit, because this class of rack moves around a lot on price.
Flaws but not dealbreakers: A four-bike load is a lot of leverage on a receiver. If your hitch is the smaller 1.25-inch size, a four-bike rack is asking a lot of it, and I would keep the count at two bikes and add a stabilizer. Also budget a locking hitch pin, because the pin that ships in the box is not a security device.
Anyone with a 2-inch receiver, a family's worth of bikes under 35 pounds each, and a hatch or tailgate they need to reach will get along with this rack.
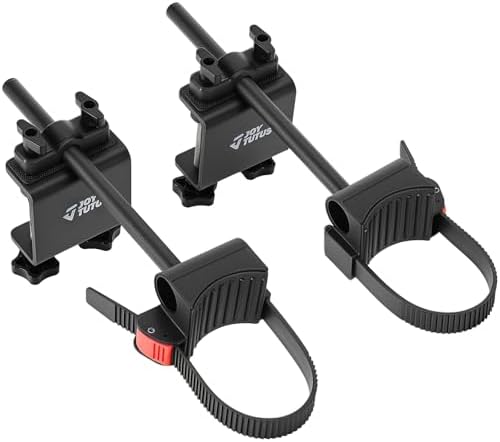
Truck-bed pick: JOYTUTUS Truck Bed Bike Rack Mount, Bike Rack for Pickup Truck Bed, No Remove Tire, Anti-Wobble Bike Holder, Strengthen Metal Bicycle Mount
 Visit on Amazon →
If you drive a pickup and you are tired of laying bikes flat in the bed with a moving blanket over them, this is the other path. The no-remove-tire design is the part that matters. Fork-mount rails make you pull the front wheel and bolt the dropout to a skewer, which means finding a place inside the cab for a wheel that is now loose and dirty. This holder clamps the bike whole, so loading is a lift and a clamp instead of a two-part operation.
The anti-wobble holder and the strengthened metal construction are the two claims I care about most in a bed rack, because the failure mode for this category is a bike that rocks side to side against the bedside until something fatigues. A holder that grips the bike rigidly is doing the same job a tray rack does in a receiver, just inside the truck.
Check current Amazon price before you order.
Flaws but not dealbreakers: A bed rack needs a bed to clamp to, so it lives or dies on your bed dimensions and whatever cover or liner you have installed. Measure the bed length against your wheelbase before you buy, and confirm the mounting point clears your tonneau rails. If you routinely carry a full bed of cargo plus bikes, a hitch rack will serve you better.
Anyone with an open pickup bed, a bike they load alone, and no desire to remove a wheel will prefer this to a fork mount.
What you need before you start
Gather this before you touch the vehicle, because a second trip to the hardware store in the middle of a mount job is how racks end up half-installed and driven on anyway.
- A torque wrench. Hitch hardware and bed clamps both have a spec, and hand-tight is not a spec.
- A locking hitch pin or a bed-rail lock, depending on the platform.
- An anti-rattle or stabilizer device for the receiver if your rack does not include one.
- A tape measure, for clearance and for bed length.
- A second person for the first mount. Racks are awkward, and dropping one on a bumper is an expensive lesson.
- A headlamp. You will load in the dark more often than you think.
The mounting workflow, step by step
Step one: confirm the receiver class or the bed dimensions. On a hitch, look at the opening. A 1.25-inch receiver is the light-duty size and it limits you in both capacity and stability. A 2-inch receiver is the real standard and what most four-bike racks are designed around. On a pickup, measure the bed and note where your mounting points land relative to the wheel wells.
Step two: clean the mounting surface. A receiver with rust, grit, or old grease inside it will not let the rack seat fully, and a rack that does not seat fully will wobble no matter how hard you tighten the pin. Same for bed rails and clamp surfaces.
Step three: insert the rack and set the pin. Slide it in until it stops, line up the pin holes, and insert the pin. If the holes do not line up cleanly, do not force it and do not drill anything. Something is wrong with the fit.
Step four: install the anti-rattle hardware. This is the step people skip and the reason their rack rattles at 65. Whether it is a wedge, a threaded stabilizer, or a cam, it takes the play out of the receiver interface. Tighten it after the pin is in, not before.
Step five: check the tilt or swing mechanism. Cycle it once, empty, before any bike goes on. If it binds when empty, it will be worse loaded, and a tilt feature that does not work with a bike on it is a tilt feature you will never use.
Step six: torque everything. Hitch pin, stabilizer, clamp bolts, cradle hardware. Recheck after the first 50 miles, because new hardware settles.
Step seven: test clearance. With the rack in the carry position, open the hatch or tailgate. With it in the stowed position, check that it does not sit below your departure angle or block the backup camera. A rack that blocks the camera is a rack you will eventually back into something.
Step eight: load a bike and re-check. Put one bike on and look at the whole assembly from ten feet away. Anything that looks crooked now will be worse at speed.
Loading and strapping the bike
Load the heaviest bike closest to the vehicle. That keeps the cantilevered weight where the structure is strongest and reduces how much the far end of the rack wants to move.
Route every strap so it pulls the bike down and toward the rack, not sideways. A strap that pulls laterally will loosen as the bike shifts, and a loose strap is how a bike ends up dragging on the pavement.
If you ride carbon, check the contact points. Straps that hook over a rim can scratch or crush a carbon rim if they are over-tightened, and frame hooks on a hanging rack are off the table entirely for carbon frames. That is not a preference, it is a rule.
Wheel straps go on last, after the frame is settled, and they get re-checked at the first stop.
The highway check
Do a short loop before you commit to a long drive. Ten minutes on a highway, then pull over and put a hand on every strap, the hitch pin, and the stabilizer.
What you are listening for is a rhythmic rattle that changes with speed. A constant hum is wind. A rattle that appears at 60 and disappears at 70 is hardware, and it will get worse, not better. If the handlebars of the loaded bike are moving more than the vehicle is, you either need more anti-sway at the frame or less weight on the rack.
Check the rack again after the first 50 miles of any long trip. That is the interval where new hardware settles and where most people discover their pin was never fully seated.
The competition and why it lost
Trunk strap racks are cheap and they fit almost anything, and I will not recommend one for a bike worth more than a few hundred dollars. The straps hook to sheet metal and glass, they scratch paint, they block your lights, and they swing in crosswinds. They are occasional-use equipment.
Roof racks carry bikes well and keep them out of the wind shadow of a trailer, but they are a different article and a different set of problems: lifting a bike over your head, garage clearance, and a much higher center of gravity.
Hanging hitch racks are the budget path to four bikes, and they are fine for heavy steel and aluminum frames on short trips. They are not fine for carbon, and they are not fine for long highway runs with a light bike that can pendulum.
Tray racks are where I would put my own money for two bikes. For four bikes on a family vehicle, a swing-down hitch rack is the practical compromise, and for a pickup bed, a holder-style rack beats a fork mount on convenience every single time.
What this costs you
The money question has three parts, and only one of them is the rack.
The rack itself. Check current Amazon price on the two above; that is the number that changes.
The platform. If you do not already have a 2-inch receiver, the hitch is the real line item, and it is worth doing properly because everything else bolts to it.
The accessories. A locking pin, a stabilizer if the rack does not include one, and a cable lock for the bikes. These are small costs that prevent large ones.
Then there is the time cost, which is the one people ignore. A rack that takes thirty minutes to mount gets used half as often as one that takes five, and a rack that takes five minutes to load gets used on the weeknights, not just the weekend trips. That is the whole argument for spending on the mounting interface rather than the frame tubes.
Mount it once, torque it, check it at 50 miles, and then the only thing you think about is where you are riding. That is the job.