Most people buy one rack and ask it to do two jobs. That is how bikes end up leaning against the garage wall in a pile, and how a trunk rack ends up in a closet because it takes twenty minutes to strap on and nobody wants to do that on a Saturday morning. Bike rack setup is really two separate projects: a fixed stand at home where the bikes live, and a removable rack that goes on the car for the days you actually drive somewhere to ride.
I am Simone, and I ride road and gravel out of Boulder, Colorado. I commute, I race crits, and most weekends I put bikes on a car and drive into the mountains. In twelve years I have owned eight racks. One was a trunk strap rack that scratched the paint on a leased sedan. One was a hanging rack that swung into a highway divider with two bikes on it. One was a tray rack that survived a deer strike and still holds bikes straight today.
This guide covers the two racks that solve the two jobs, and how to set up each one so it does not damage a bike, a car, or your morning.
Why you should trust me
A bike rack is safety equipment, not cargo gear. I have watched a cheap rack launch an expensive bike onto a highway, and I have spent more hours than I want to admit re-tensioning straps in a trailhead parking lot with cold hands. I measure installation time, how long it takes to load a bike in the dark after a long ride, and how much a loaded rack moves at highway speed.
I am also a hitch person first. My daily driver wears a 2 inch receiver and a tray rack, and that is what I would tell a friend with a carbon race bike to buy. When I recommend a trunk rack, it is for a specific job: occasional trips with a bike you are not terrified of scratching. And when I recommend a floor stand, it is because the alternative is a pile of bikes in the garage that costs you a derailleur hanger every spring.
How I picked these two and what I checked
Two racks, two jobs, so I judged them differently.
For the floor stand I looked at how it holds a bike (wheel contact versus frame contact), how much floor it eats, whether it stays put on a smooth concrete floor, what the hardware is made of, and whether it survives a Colorado winter of wet, salted bikes coming home in January.
For the trunk rack I looked at what touches the car, what touches the bike, how the straps route, and how the whole thing behaves when a semi passes you at 75 mph.
I am not going to pretend I have a full season on either of these two specific racks, so you will not get invented test numbers from me. What you will get is what I check on the listing before I spend money, what I check at the car before I load, and the setup steps that keep a trunk rack from becoming a paint repair.
The two racks you'll need before you start
You can set up a whole bike-hauling life with these two, and neither one requires drilling into a car or installing a hitch.
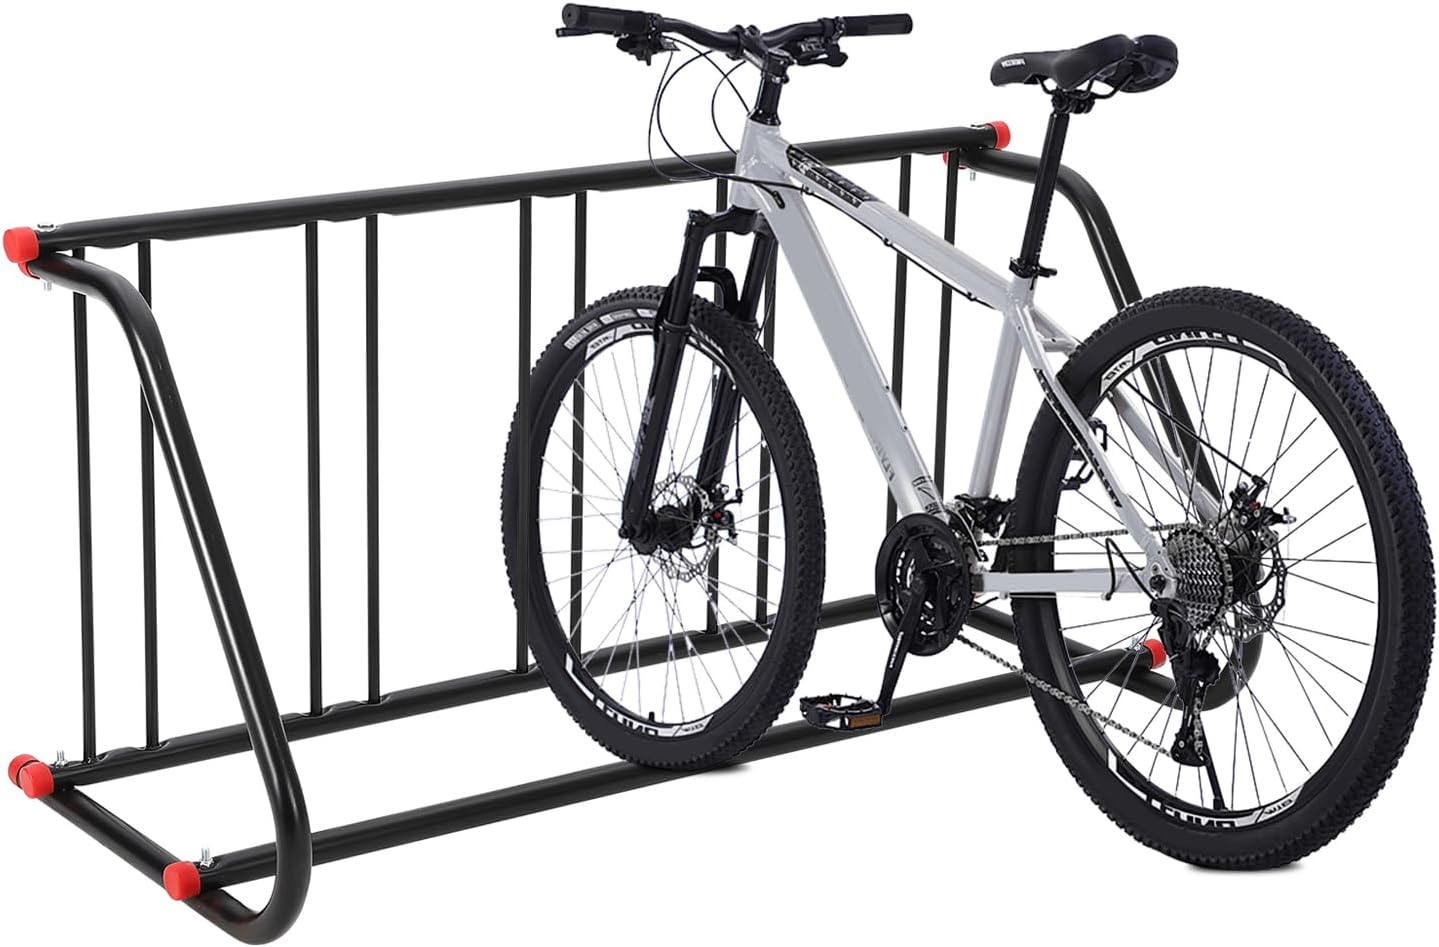
The home base: Commercial Grid Bike Rack - Heavy Duty Metal Floor Bike Stand, Outdoor Bicycle Rack for Garage, School, Outdoor Parking, Bike Shop, 5-Bicycle Capacity (Single & Double Sided)
 Visit on Amazon →
This is a floor stand, not a car rack, and that distinction matters. It is a heavy duty metal grid that lives on your garage floor and holds up to five bikes, single or double sided, which means it works as a wall of bikes for a family, a school, an apartment garage, or a shop. Nothing touches your frame, because the bikes rest on the floor and stand upright in the grid, which is exactly what you want if you own anything with thin tubing or a nice paint job.
The honest caveats: it is furniture. It takes floor space, it does not fold into a hatchback, and if your garage is already tight with two cars, you need to measure before you order. A smooth epoxy floor plus a loaded stand can also slide if someone backs into it, which is a rubber mat or two anchor bolts away from being a non-issue. If you park outside, know that any steel stand left wet and salty all winter will eventually show it, so a rinse and a dry rag in January goes a long way.
For a household with three to five bikes that currently live against the drywall, this is the single best change you can make to the garage.
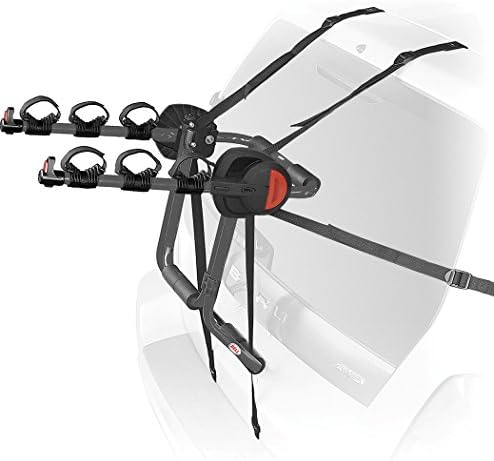
The road trip pick: Bell Bike Trunk Rack
 Visit on Amazon →
A trunk rack straps onto the trunk lid or hatch of a car you are not going to modify. No hitch, no roof bars, no drilling. That is the entire appeal, and it is a real one: for a sedan owner who hauls a bike four times a year to a greenway or a lake path, this is the least expensive way to get rolling.
Here is my line, and I hold it: a trunk rack is for occasional use on a bike you can afford to replace. It scratches paint if you do not clean the contact points, it moves in wind if you do not re-tension the straps, and it can block your brake lights, plate, and backup camera on the wrong car. I will not recommend one for a bike over $800, and if you ride carbon, hanging racks are off the table, full stop.
Treat it as a tool with a job, use it the way I lay out below, and it will get a commuter or a kids' bike to the trailhead just fine.
Setting up the floor stand in the garage
Step one: Pick the wall, not the middle of the floor. You want the stand against a wall, out of the swing of the garage door, and clear of where car doors open. Walk the path you take when you wheel a bike out at 6 a.m. and make sure it is clear.
Step two: Count the bikes that actually live there. The grid holds five. If you have wide handlebars or a fat bike, measure the bar width and the wheel size against the stand's spacing before you commit, because a stand that fits four of your five bikes is a stand that annoys you daily.
Step three: Check the floor. Concrete is ideal. A sloped driveway apron or a very smooth coated floor is where a loaded stand wants to walk, so plan on a rubber mat underneath or anchor it.
Step four: Assemble it empty, in the spot where it will live. Snug every fastener, then push the empty stand side to side and front to back. If it rocks now, it will rock harder with five bikes in it.
Step five: Load in the order you ride. Put the bike you ride most in the outermost slot so you are not dragging it past four others every morning. Alternate direction only if the stand is designed for it.
Step six: Solve the dark now. A headlamp hanging on the grid, or a shop light on a hook above it, is the difference between a rack you use and a rack you fight. Loading in the dark is where most home setups fail.
Step seven: Winter routine. Rinse the road salt off the bikes and the stand, dry the joints, and glance at the welds and hardware. Steel and salt are not friends.
Setting up the trunk rack on the car
Step one: Read the owner's manual and look at your trunk. Strap racks need a metal trunk lid edge or hatch edge to hook onto. Spoilers, plastic panels, and some glass hatches are not compatible, and some cars explicitly say no strap racks. Also check your state's rules on plate and light visibility.
Step two: Clean both surfaces. Wash the trunk lid and wipe the rack's pads. Grit trapped under a pad is what scratches paint, not the pad itself.
Step three: Test fit the rack empty. Top hooks go over the trunk lid edge, side straps go to the fender gaps or trunk seams, and the bottom straps go under the bumper. Close the lid slowly on the straps instead of slamming it.
Step four: Tighten evenly, then bounce test. Push the rack side to side and front to back. If it moves on the car with nothing on it, it will move more with a bike loaded.
Step five: Load the bike the way the rack is designed to carry it. A trunk rack hangs the bike by the top tube, so check the frame material and the weight limit before you lift anything. Carbon is a hard no. Step-through frames and kids' bikes often will not hang level without an adapter bar, so know that before you are standing in the driveway with one hand on a bike.
Step six: Secure the wheels and the frame. Use the straps that came with the rack and take up every inch of slack. A wheel that can spin in the wind is a wheel that can swing.
Step seven: Re-tension after five to ten miles. Straps settle once they are under load. Pull over, check every strap, check the bike, and then drive on.
Step eight: Check the view before you hit the highway. Mirror, backup camera, brake lights, plate. If the rack blocks any of them, fix it before you are at speed, not after.
Step nine: Unload and store it dry. Straps die from UV and from sitting wet. Hang the rack in the garage, not on the car, and it will last years longer.
When this setup is the wrong answer
If you ride carbon, skip the trunk rack entirely. If you haul bikes every weekend, install a hitch and buy a tray rack, because a trunk rack will wear you down. If you ride a heavy e-bike, neither of these is the right tool. If you drive a car with a plastic or glass hatch, verify compatibility before you spend a dollar.
And if you tow an RV or a fifth wheel, this guide is not for you. The weight and wind physics are completely different, and I do not write about those racks.
What this all costs
The floor stand is a one-time purchase that ends the pile of bikes against the wall, and it replaces the annual cost of bent derailleur hangers and scratched top tubes. The trunk rack is a small one-time purchase that gets a bike to a trailhead without installing a hitch. Check current Amazon price on both before you decide, and compare that number to what a paint repair or a replacement frame actually costs you.
The math is the easy part. The setup is what separates a rack that gets used from a rack that gets resented. Get the stand level and loaded in the order you ride, strap the trunk rack on tight, re-tension it after the first few miles, and check your lights and camera every single time. Do that, and both racks will quietly do their jobs for years.
That is the whole job. Your bikes deserve better than the garage floor, and your car deserves better than a rack that was never tightened down.