Most rack advice starts from the assumption that you have a hitch. Half the cars in my club's parking lot don't, and half of those owners have already been talked into a trunk rack that scratched the paint on the first weekend. A roof bike rack setup is the honest answer for a lot of those cars, and it is also the setup people get wrong most often, because they buy the carrier before they think about the crossbars, the loading sequence, or where the bikes live the other six days of the week.
I'm Simone. I live in Boulder, I race gravel and crits, and I have owned eight racks in twelve years. I have measured installation time, wobble at 75 mph, and how long it takes to load a bike in the dark after a long ride. I am a hitch person by conviction. If your car has a 2-inch receiver, I will point you at a tray rack every single time and you can stop reading.
But a roof carrier done right beats a trunk rack done wrong, and that is the comparison most riders actually face.
Why you should trust me
Twelve years of racks has produced three that I would buy again and five that taught me something. The trunk strap rack scratched the paint on a car I was still making payments on. The hanging rack swung into a highway divider on I-25 with two bikes on it, which is the day I stopped recommending hanging racks to anyone with a carbon frame. The tray rack survived a deer strike at speed and kept the bike on the car, which is the day I stopped thinking of a rack as cargo gear and started thinking of it as safety equipment.
I do not review roof racks for a living. That is worth saying out loud, because the internet is full of people who will tell you a roof carrier is junk after one bad experience in a parking garage. I am the hitch person in the group, so I stay in my lane on the hitch side. What I can tell you about the roof side is the part that actually causes failures: the crossbars, the load rating, the clearance number nobody writes down, and the loading sequence.
How I picked and what I checked
I did not run a wobble test on either piece in this guide, and I am not going to pretend I did. What I did instead was check the things that decide whether a roof setup survives its first season:
- Does the carrier attach to the crossbars I already own, or does it drag a whole new bar system into the purchase?
- How many points of contact hold the bike? A bike restrained at two points cannot pivot. A bike restrained at one point is a lever.
- Can it hold a bike without clamping the frame? This is not a style preference. Carbon frames and thin-walled aluminum frames do not want a clamp around the tubes.
- Does the load rating on the carrier match the bike I actually own, not the bike I wish I owned?
- Can I load it without lifting the bike above my shoulders, and can I do it in the dark?
- On the storage side: does it hold a fat tire and a road bike in the same footprint, and can I pull one bike out without moving three?
That last question is where most garage storage fails. It is not about how many bikes a stand claims to hold. It is about whether the stand is still usable on a Tuesday when you are late for a group ride.
What has to be true before you buy anything
Direct answers first, because this is where the money gets wasted.
Check the roof load rating in your owner's manual. That number is a system rating for the bars, towers, and feet, not a rating for the carrier. A carrier rated for a heavy bike does not raise the roof's limit.
Measure from the ground to the top of your crossbars, then add the bike. If the total is above your comfortable reach, you will use the setup twice and then leave it in the garage. This is the single most common reason a roof rack goes unused.
Measure your garage door opening. Then subtract. A bike on a roof adds far more height than people picture, and the number one roof rack disaster is not wind, it is a garage door. Write the total height on a sticky note and put it on the dashboard. If you park in a structure with a clearance bar, that bar is not a suggestion.
Know your bike's weight and your frame material. E-bikes are out for most roof setups, and they are definitely out for a roof you have to lift a bike onto. Carbon frames are fine on a carrier that holds the bike by the wheels or at the fork, and they are not fine under a frame clamp or on a hanging rack.
Plan for a lock. A roof carrier usually takes a single cable or a locking skewer, and one key for four bikes is one of my least favorite things about this hobby. Buy the lock at the same time as the carrier, not after the first trip.
The carrier that goes on the roof
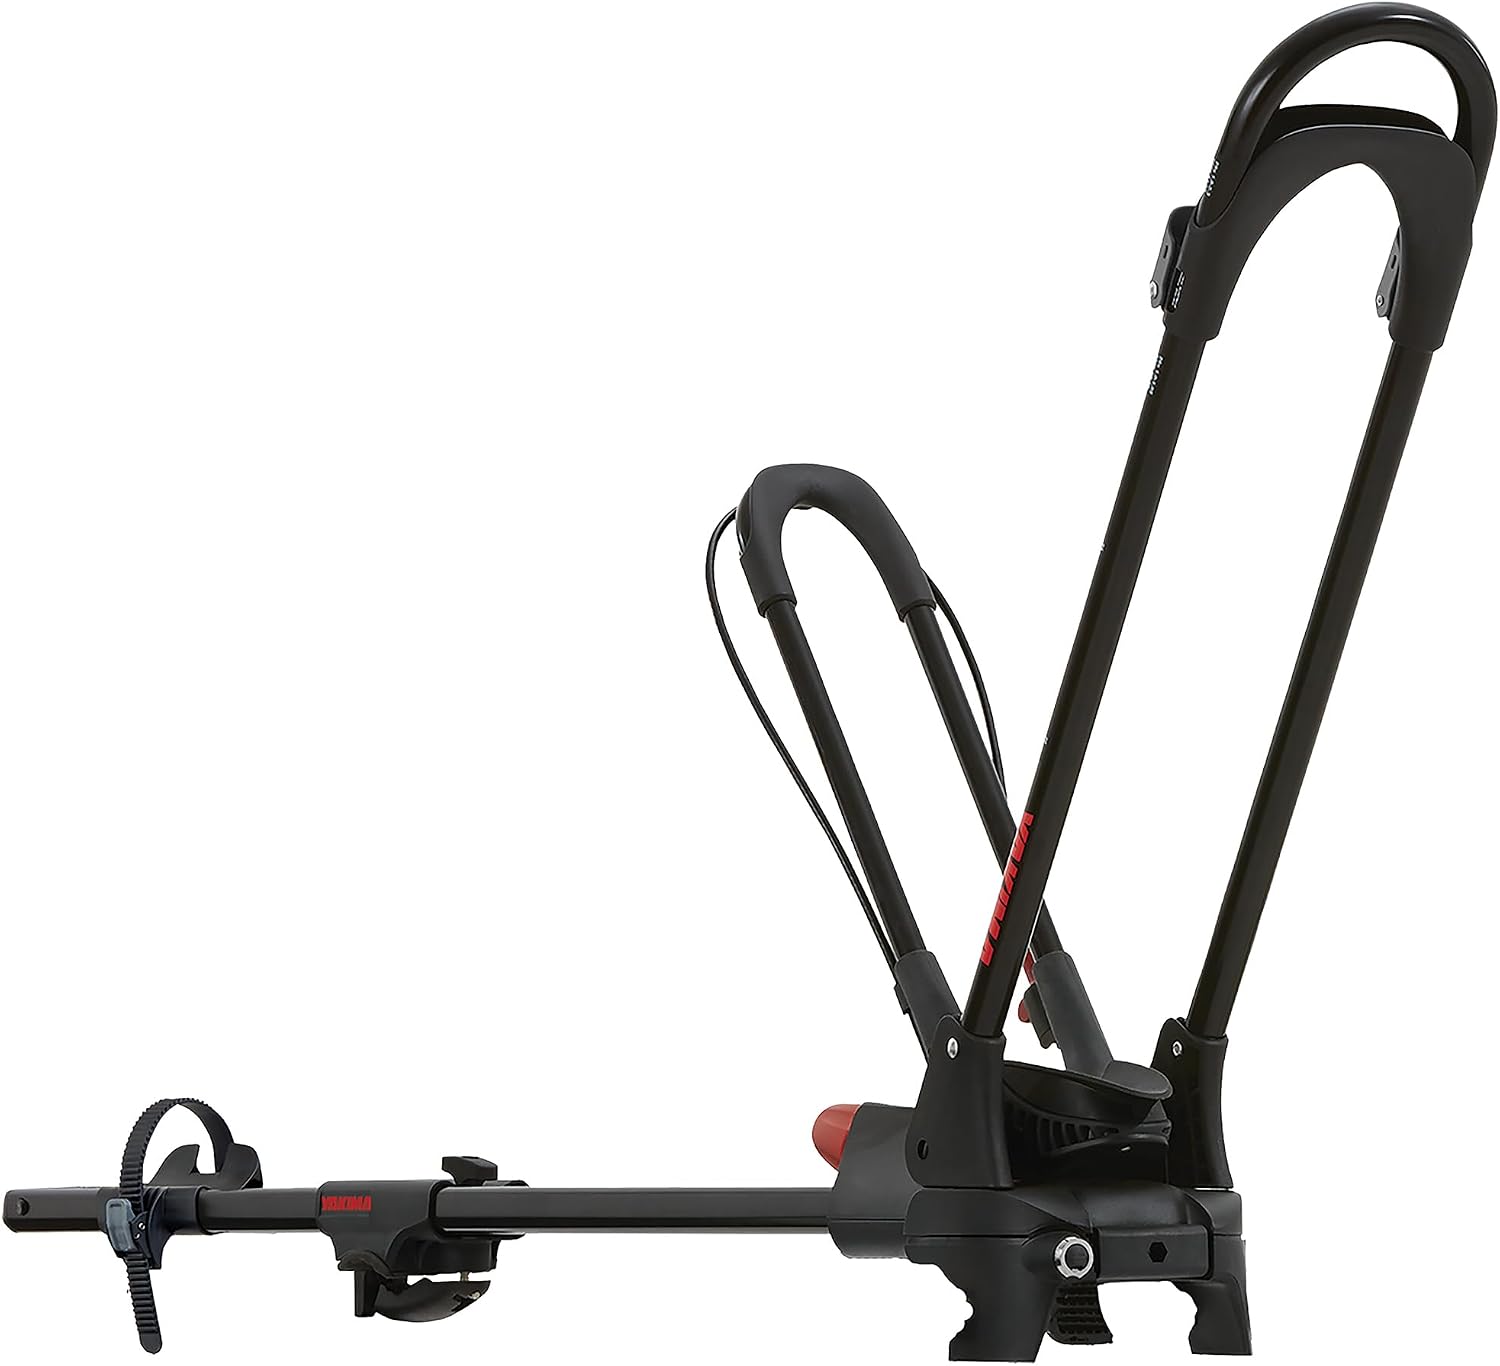
Our pick: Yakima FrontLoader Rooftop Bike Rack Mount, Car & SUV Roof Carrier
 Visit on Amazon →
This is the roof carrier I point friends to when they ask, and the reason is boring and correct: Yakima is one of the few brands I would trust to still support the hardware five years from now. Racks get discontinued, mounts get redesigned, and the person who bought the no-name carrier is the person hunting for a bracket on a forum in 2031.
Before you order, verify three things against your car. First, the crossbar situation: factory bars, aftermarket bars, and bare roofs are three different purchases, and the carrier is only one part of the system. Second, the roof load rating, which lives in your manual and not on the product page. Third, whether the carrier is rated for the number of bikes you plan to carry, because a roof carrier in this class holds one bike, and the roof tax is real. Two riders on a roof usually means two carriers, not one.
Flaws but not dealbreakers: Everything that makes a roof rack a roof rack is also the flaw. You lift the bike over your head. You cannot see it from the driver's seat, so you will check the mirror for the first fifty miles like a new parent. You have to take it off before a car wash or a parking garage, which means you need somewhere in the garage to put it. None of that is a defect. It is the design, and you should decide whether you can live with it before you spend the money, not after.
Anyone with no hitch, a car or SUV with crossbars, and one bike worth protecting will get the most out of this. If you ride a step-through frame or you are hauling four bikes every weekend, keep reading and then go look at a hitch.
Where the bikes live when they are not on the car
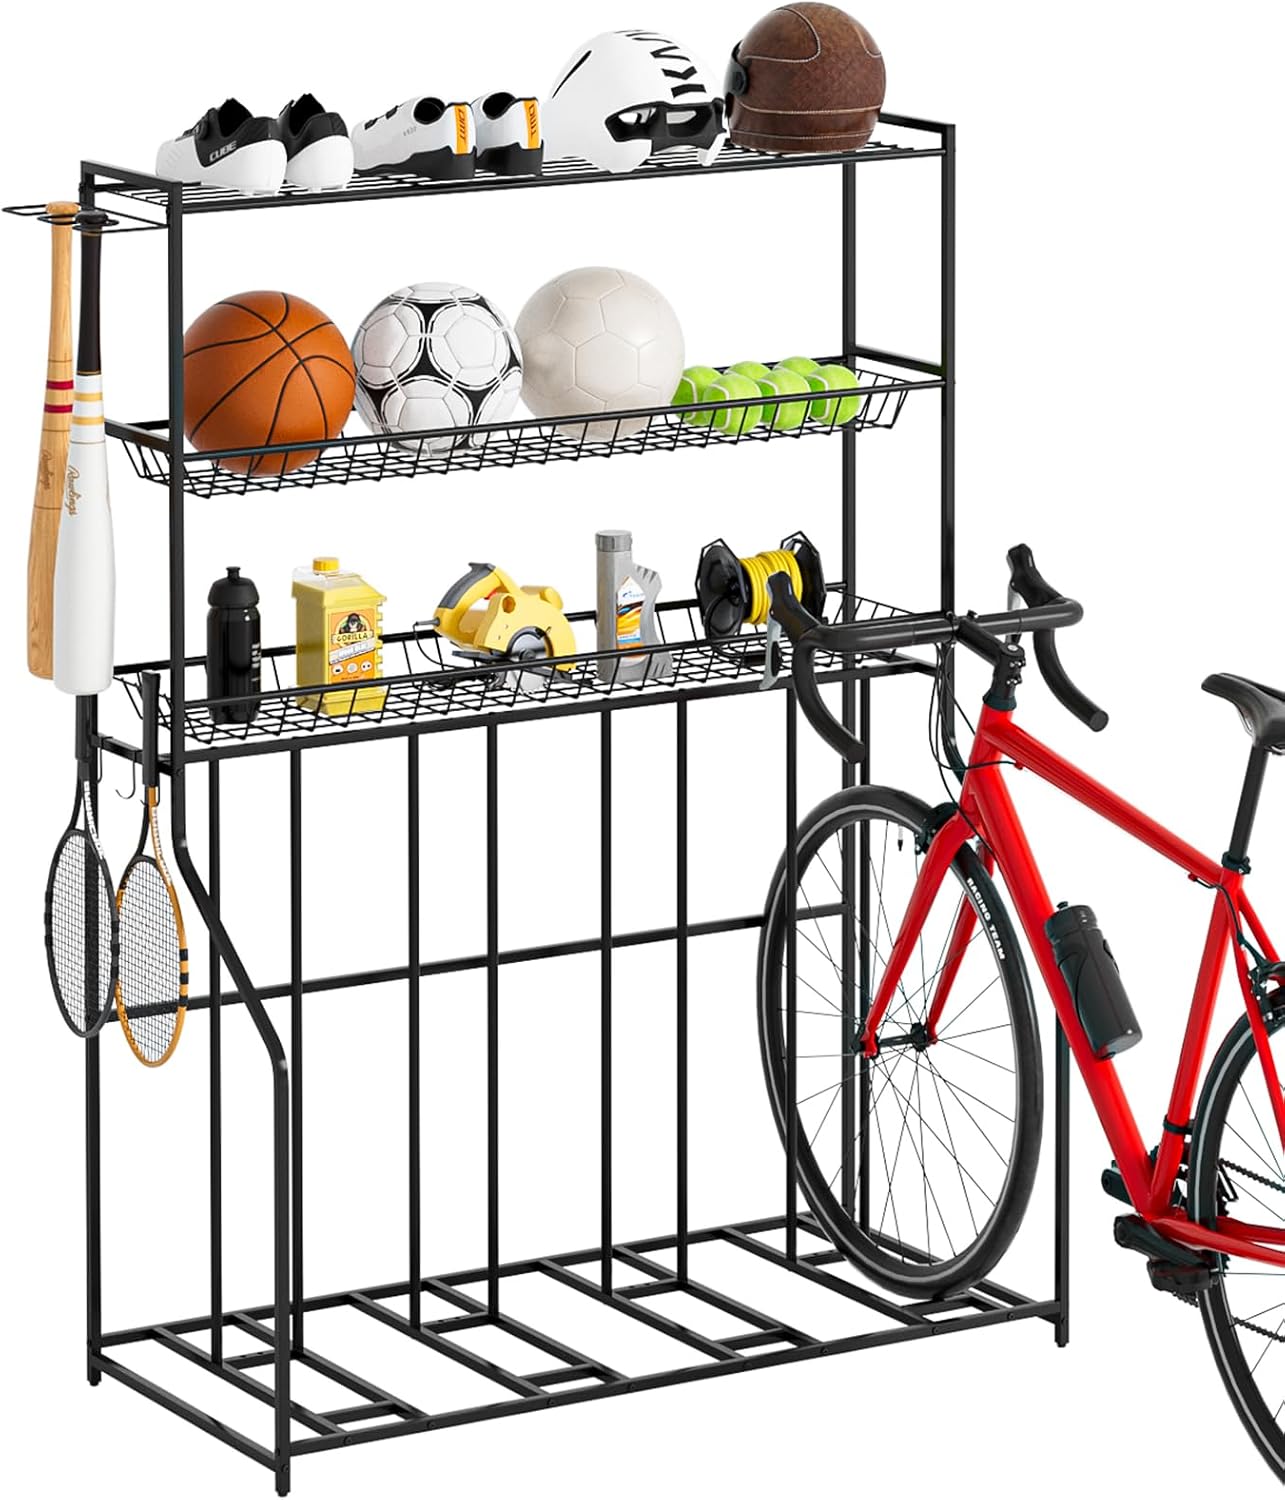
The home base: 4 Bike Stand, Bike Rack Garage with 3-Tier Storage Rack, Bicycle Stand for Garage Organizer, Indoor Sporting Gear Storage Station for Mountain/Road/Hybrid & Fat Tire Bike, Patent Pending
 Visit on Amazon →
The unglamorous half of a roof setup is what happens when the car is parked. If your bikes lean against the wall in a pile, every ride starts with two minutes of untangling, and two minutes of untangling is how a weekly ride becomes a monthly ride.
This is a floor stand with three tiers and a four-bike capacity, and the detail that matters most is in the name: fat tire compatibility. Most cheap stands are built around a 700c wheel and a road tire, and a 4.5-inch fat bike either does not fit or sits in the stand like a coin in a parking meter. If your household has mixed wheel sizes, that line is the one to read twice.
What to check before you commit: the footprint against the wall you have in mind, whether the tiers clear your handlebars and pedals when four bikes are loaded, and whether the bike you ride most often ends up on the tier you can reach without lifting anything. That last one is a setup decision, not a product decision, and it is the difference between a storage rack and a storage rack you actually use.
Flaws but not dealbreakers: It is a stand, not a lock. A garage stand keeps bikes organized, it does not keep them safe from anyone who walks into the garage. Three tiers also means the top bike goes overhead, though the lift is a foot or two rather than a roof, so it is a much friendlier motion than loading a car. And a floor stand still owns floor space. Measure it, because a four-bike stand that does not fit where you want it becomes a four-bike stand in the middle of the garage.
Anyone with three or four bikes, mixed wheel sizes, and a wall they are tired of tripping over will be happy here.
The setup, step by step
This is the sequence that keeps a roof setup working. Do it in order.
Step one: get the numbers. Roof load rating from the manual. Crossbar spread. Ground-to-crossbar height. Garage door opening height. Write all four down. If the ground-to-crossbar height plus the bike height is taller than your garage opening, the car goes outside or the rack comes off. There is no third option.
Step two: build the carrier on the ground. Assemble and adjust it on a workbench or a driveway, with the bike off the car. Every adjustment is easier at waist height, and every mistake is cheaper there too.
Step three: mount the carrier to the bars, still with no bike on it. Get it centered, get it snug, and then check it again after a day. New hardware settles.
Step four: fit the carrier to your bike. Set the contact points to your wheelbase and your wheel size. This is the step people skip, and it is why a bike wobbles on a rack that is perfectly tight.
Step five: load the bike, wheels first. Front wheel into its position, rear wheel settled, then the retention point snug, then the strap or tie-down last. Snug means snug. If you are compressing a tube or a rim, you are overdoing it, and a rim does not forgive that.
Step six: shake test. Grab the bike at the saddle and push it side to side. Movement at the mount is a loose bracket. Movement at the bike is a loose retention point. Find which one it is before you drive.
Step seven: the first drive. Fifteen minutes at city speeds, then pull over and re-check everything. Then a highway run, then re-check. Re-check at every stop for the first trip out. After that, a quick grab-and-push before you leave the driveway is enough.
Step eight: set up the stand before the next ride. Load the stand in the order you pull bikes out, not the order you happen to carry them in. The bike you ride four times a week belongs on the easiest tier. The bike you race belongs somewhere it will not get knocked.
Step nine: load in the dark once, on purpose. Turn the garage light off and do the whole sequence. This is the test that tells you whether your setup is real. A rack that takes thirty seconds in daylight and four minutes in the dark is a rack that gets skipped on a Tuesday night.
The competition and why it lost
Hitch tray racks are my default and they are not in this guide, because this guide is for the cars that cannot take one. If you have a 2-inch receiver, close this tab and go buy a tray rack. I mean that.
Hanging racks are the cheapest way to carry multiple bikes and the last way I would carry a carbon frame. They swing, they let bikes rub, and the straps are usually the cheapest part of the product. Trunk racks are for occasional use on inexpensive bikes. I will not recommend one for a bike over $800, and I will not recommend one at all if you care about your paint.
A roof carrier is the right answer for a car with factory crossbars, one or two bikes, and a rider who is willing to lift. It is the wrong answer for a step-through frame, an e-bike, or anyone who parks in a garage with a low door and a short memory.
What this all costs
Two purchases, and I am not going to quote numbers, because prices move and a stale price is worse than no price. Check the current Amazon price on the carrier and on the stand before you decide, and add the roof bar system if your car does not already have crossbars, because that is the line item people forget.
The math that actually matters is cost per use. If you haul bikes twice a year, almost any rack is expensive per trip, and you should rent or borrow. If you ride weekly, the carrier pays for itself in one season of not dreading the load, and the stand pays for itself in the two minutes you stop spending untangling bikes every Saturday morning.
The rack is the easy part to buy. The sequence is the part that keeps a $4,000 bike on the roof, and the sequence costs nothing but attention.
Do the measurements. Write them down. Load in the dark once before you trust it. That is the whole job.